
TL;DR

Turn quiet afternoons into listening time
- Thousands of audiobooks, podcasts and originals
- Listen on your phone, tablet or Echo — also offline
- Cancel anytime
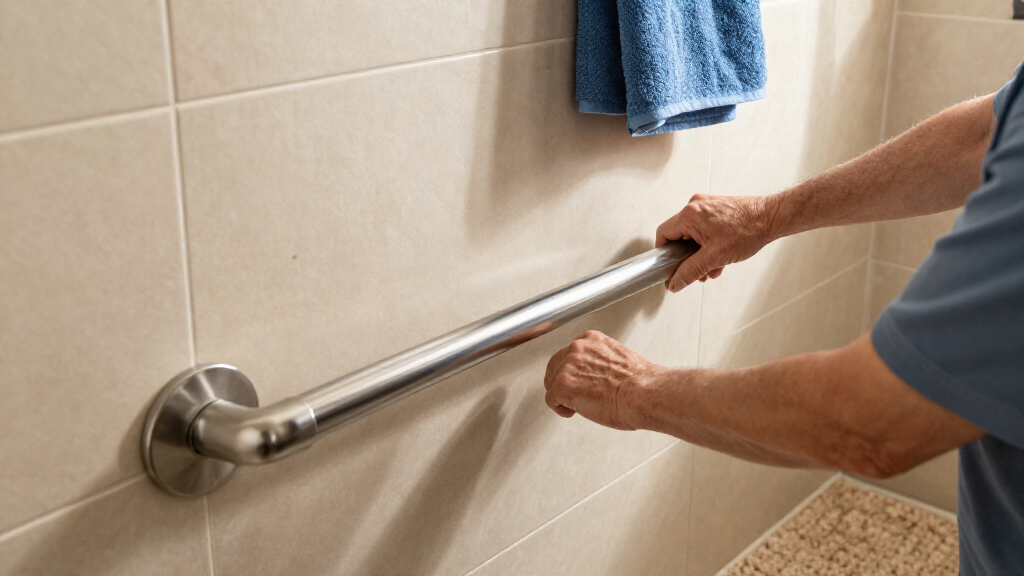
To keep grab bars secure over time, check the bar, mounting flanges, fasteners, and surrounding wall about once a month and after leaks, renovations, or impacts. If a bar moves, creaks, or pulls away, stop relying on it and have the mounting inspected; a replacement bar alone cannot fix damaged backing.
A grab bar can look solid and still be attached to a wall that cannot support it. The part you hold is only one link in a chain: the bar, its fasteners, the backing behind the wall, and the wall surface all need to work together.
This guide shows you how to keep grab bars secure over time, what to look for during a simple monthly check, and when a loose bar calls for a professional inspection. You’ll also learn why tile, suction cups, cleaning products, and even a small leak can change what you should do next.
Think of the mounting like the roots of a tree. A sturdy trunk matters, but roots that have lost their grip can’t keep it steady in a gust. A careful routine helps you spot trouble early while preserving a bathroom that feels comfortable and familiar.
Inspect the bar, mounting flanges, visible fasteners, surrounding wall, and nearby tile about once a month.
Check sooner after a leak, renovation, noticeable impact, or a change in how the bar feels.
If a bar moves, creaks, pulls away, or has damaged fasteners, stop relying on it and arrange an inspection.
Do not assume tile or drywall can support a grab bar by itself; match the mounting method to the wall and product instructions.
A replacement bar will not fix damaged backing, and a towel bar is not a safe substitute.
Keep Grab Bars Secure Over Time
A grab bar is only as dependable as its fasteners, backing, and surrounding wall. Regular checks help you spot changes before someone relies on it.
Check the whole assembly
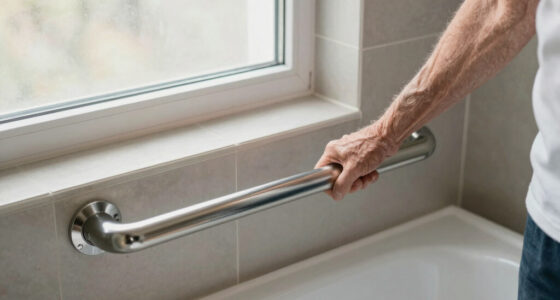
Look beyond the grip surface for changes at the mounting points and nearby wall.
Inspect the grip
Look for bending, cracks, corrosion, or a flaking finish.
Check flanges and screws
Notice missing fasteners, new gaps, or a flange pulling away.
Look for damage
Cracked tile, loose grout, stains, or swelling can signal trouble.
Know when to stop using it
Movement, creaking, or a growing gap calls for an inspection.
Do not test a suspect bar with your body weight.
Make clear that the bar is out of service while it is checked.
Have the bar, fasteners, wall, and backing assessed together.
Match the mounting to the wall
A sound installation depends on suitable support behind the surface.
- Fasteners reach suitable structural backing or use an approved method.
- Installation follows the product instructions and wall type.
- Tile and drywall are finish surfaces, not dependable anchors alone.
- A replacement bar cannot repair damaged backing.
Start with the wall: the mounting matters more than the bar
To keep grab bars secure over time, make sure the fasteners connect to suitable structural backing or an installation method approved for that wall. Drywall and tile are finish surfaces; they do not automatically provide a dependable anchor for a person’s weight.
That distinction is easy to miss because a newly installed bar can feel firm when you first touch it. Imagine a bar mounted beside a shower on glossy tile: the smooth surface looks strong, but the important question is what sits behind it and how the fasteners reach that support.
Wall construction varies. A stud-backed wall, masonry, and a prefabricated shower surround each call for a mounting approach suited to the material and the product. Tile can be part of a sound installation, but drilling through it requires care, and the tile itself should not be treated as the structural anchor.
Before you install or replace a bar, check the manufacturer’s instructions and the wall type. If you do not know what is behind the surface, ask a qualified installer to inspect it. This is especially helpful if someone will use the bar for transfers or substantial body support. The right location and attachment depend on the person, the task, the building, and local requirements.
A product’s stated capacity is not a promise that every wall can support that load. The bar and its installation both matter, much like a strong handle attached to a weak drawer front. Follow the product’s stated limits, and do not assume that one screw size, bar height, or mounting method fits every bathroom.
Products Worth Considering

Philips Hue White and Color Ambiance A19 Smart Bulb Starter Kit, 2-Pack

Dyson V15 Detect Cordless Vacuum

Dreame G10 Pro Wet and Dry Vacuum Mop
As an affiliate, we earn on qualifying purchases.
Use this monthly check to catch movement before it grows
A monthly inspection helps you spot changes in the bar, its fasteners, and the wall before you rely on it again. Check sooner after a leak, renovation, noticeable impact, or any change in how the bar feels; use the manufacturer’s or installer’s schedule if it differs.
- Look closely at the bar. Check for bending, cracks, corrosion, missing parts, or a finish that is flaking.
- Inspect the mounting points. Look for missing or visibly loose screws, a flange pulling away from the wall, or a new gap.
- Check the surrounding surface. Look for cracked tile, loose grout, stained drywall, swelling, or other signs of water damage.
- Notice changes in sound or feel. Creaking or movement can signal a problem. Don’t put your full weight on a bar that may be failing to see whether it holds.
- Record what you see. A quick note or dated photo can help you spot a gap or crack that is slowly changing.
For example, a caregiver might notice that a flange looks flush one month and has a thin shadow beneath one edge the next. That small difference deserves attention even if the bar still feels steady during a light touch.
Check the whole assembly rather than focusing only on the grip surface. A bar can have a clean finish while a nearby tile cracks or a fastener begins to loosen. If you see movement, a growing gap, rust, or damage, stop relying on the bar and arrange an inspection. A visual check is useful, but it does not certify that the mounting can bear body weight.
Treat movement, creaks, and gaps as reasons to stop
If a grab bar moves, creaks, or pulls away from the wall, stop relying on it until the mounting has been inspected and repaired. A damaged fastener or weakened backing can make a bar unreliable even when the movement seems small.
Warning signs include a flange that no longer sits flat, loose or missing screws, cracked tile near a mounting point, rust, and water stains or swelling around the bar. A new sound matters too. A quiet bathroom can make a faint creak easy to hear, especially when the room is otherwise still.
Say a family member notices a screw head turning but not tightening. That screw may be stripped, or the material behind it may no longer hold. Tightening it harder can worsen the damage; it also cannot restore backing that has cracked or shifted.
Do not use a towel bar as a substitute. It may look similar, but towel bars are not designed or mounted to support a person’s weight. If a grab bar has visible damage, missing parts, or corrosion, replacement may be needed, but have the wall and anchors assessed too. A new bar fitted into damaged backing can inherit the same problem.
While you wait for a repair, let everyone who uses the bathroom know that the bar is out of service. A clear note or a calm conversation can prevent a visitor from grabbing it without realizing anything has changed. Ask a qualified installer what temporary support or safe routine suits the bathroom and the person using it.
Know when tightening a screw is not the repair
Tightening a fastener is suitable only when the problem is clearly a loose screw and the product’s instructions support that repair. If a screw spins, the wall is cracked, the backing is damaged, or the bar still moves afterward, stop and have the installation inspected.
A screwdriver can make a loose screw feel like an easy fix. But if the screw turns without catching, it may have lost its grip in the material behind the wall. Pushing harder can strip the hole further, damage the surface, or hide a mounting problem that still needs attention.
For instance, picture a bar beside a bathtub that shifts slightly when touched, while one screw seems loose. The flange may be moving because the hole has widened or moisture has weakened the surrounding material. Tightening that screw might quiet the movement for a day without restoring a dependable attachment.
If you have a clear, minor issue and the instructions tell you how to correct it, follow those directions carefully. Then check whether the visible gap or movement remains, but do not use your body weight as a test. When the cause is uncertain, describe what you observed to the installer and ask them to assess the bar, fasteners, wall, and backing together.
Good repair decisions protect both the wall and the person using the bar. Sometimes the answer is a correct adjustment; sometimes it involves replacing a fastener, repairing backing, or choosing a mounting system suited to the wall. The visible screw is one clue, not a complete diagnosis.
Keep moisture and harsh cleaners from hiding damage
Promptly address leaks and clean the bar according to its care instructions so moisture and harsh cleaners do not damage finishes or nearby materials. Water around a mounting point can stain or weaken the wall, while corrosion can make it harder to spot deterioration.
After a shower, take a moment to notice whether water pools around the flange or runs down a seam nearby. A recurring damp patch, peeling paint, swollen trim, or grout that keeps crumbling deserves attention. For example, a slow leak behind a shower surround may leave a faint brown mark before the wall feels soft.
Use the cleaning method recommended for the bar. An abrasive pad or a strong cleaner may scratch a finish; the wrong product can leave a surface dull or contribute to corrosion, depending on its material. If you are unsure, check the care instructions instead of guessing. A gentle wipe and a dry cloth may suit some bars, but care can vary.
Keep the nearby area visible enough to inspect. Storing bottles or hanging towels over a flange can make it easy to miss a new gap or rust spot. A quick wipe also lets you notice changes in texture and color, like roughness around a screw or a reddish streak that was not there last month.
Cleaning does not prove the mounting is sound. Treat it as one part of a sensible routine: remove grime, keep watch for leaks, and look at the wall while it is clear. If moisture keeps returning, fix the source and have any affected mounting checked before you rely on the bar.
Match the bar and its placement to the way you use the bathroom
A grab bar works best when its placement, shape, mounting, and rated capacity suit the person and the task. A bar used for light balance while stepping out of a shower may serve a different purpose from one used during a transfer, so installation choices should reflect how the person will actually use it.
Think about the route through the room: where someone reaches when entering the shower, turning, or standing near the toilet. An accessibility specialist, occupational therapist, physical therapist, or qualified installer can help assess placement for an individual and the bathroom layout. The right choice is personal; there is no single position that fits every room.
Product options include different shapes, finishes, and mounting systems. A clean-looking finish can blend with tile, while a different shape may fit a particular reach. Those choices still need to match the product’s intended use and the wall’s construction. A stylish bar that cannot be mounted appropriately for the wall does not solve the practical problem.
Consider a person who reaches for support at the shower entrance but also needs a steady hand when turning. One bar in the first convenient spot may not serve both moments well. A professional can review the movements and mounting locations rather than relying on a generic diagram alone.
For substantial body support, professional installation is especially important. Follow the manufacturer’s capacity and instructions, and check local requirements where they apply. The bar, fasteners, backing, and placement form one system; choosing them together gives you a clearer basis for confidence.
Treat suction-cup bars as limited aids, not permanent anchors
Suction-cup grab bars can be useful for limited applications when you use them exactly as directed, but check the product’s stated limits before anyone depends on one. Many are intended for temporary balance assistance rather than supporting full body weight.
A suction cup works through its seal against a suitable surface. If the surface is textured, dirty, damp, or incompatible with the product, the seal may not hold as intended. A small indicator or locking tab, when provided, can show a change in the seal, but it does not make every surface suitable.
For example, a visitor might bring a suction bar for a short stay and attach it to smooth tile. The user should still follow the instructions for placement, surface preparation, and inspection, and avoid using it beyond its stated purpose. A bar that shifts under pressure or shows a poor seal should not be relied on.
Before each use, follow the manufacturer’s inspection guidance. Recheck after moving the bar or cleaning the surface, since repositioning can affect the seal. Do not treat a suction-cup model as interchangeable with a wall-mounted bar anchored to structural backing.
If someone needs support for transfers or to bear substantial body weight, ask a qualified installer about an appropriate fixed installation. A temporary aid may suit one situation and not another. The product instructions and the person’s needs should guide the decision.
Frequently Asked Questions
How often should I check a grab bar?
A monthly visual inspection is a practical routine, unless the manufacturer or installer gives you a different schedule. Check sooner after a leak, renovation, impact, or any change in how the bar feels. For example, a new gap at the flange deserves attention right away.
How can I tell if a grab bar is loose?
Look for movement at the bar or mounting points, a flange pulling away from the wall, loose or missing fasteners, cracked tile, rust, or new creaking. Do not test a questionable bar by putting your full weight on it. Stop relying on it and arrange an inspection if you notice these signs.
Can I install a grab bar on tile?
Yes, many installations pass through tile, but the mounting must suit the wall and reach appropriate structural backing or use a method approved for that surface. Tile alone is not a reliable structural anchor, and incorrect drilling can crack it. If you do not know what lies behind the tile, ask a qualified installer.
Are suction-cup grab bars safe?
They can suit some limited uses when installed and checked exactly as the product instructions direct. Many are not intended to support full body weight, and a poor seal or incompatible surface can affect their grip. Check the stated limits and do not use one for a purpose the manufacturer excludes.
Should I tighten a loose grab bar myself?
Only when the issue is clearly a loose fastener and the manufacturer’s instructions support that repair. If a screw spins, the wall is damaged, or the bar still moves, stop using it and have the mounting inspected. Tightening cannot repair stripped holes or damaged backing.
Can I use a towel bar instead?
No. Towel bars are not designed or mounted to support a person’s weight, even if they look sturdy. If a grab bar is out of service, let household members and visitors know and arrange a suitable repair.
When should I replace a grab bar?
Replace it if it is bent, cracked, corroded, missing parts, or incompatible with its mounting system. Have the wall and anchors assessed too, since a new bar will not correct damaged backing. A qualified installer can help determine whether the bar, mounting, or both need work.
Where should grab bars be placed?
Placement depends on the person, the task, and the bathroom layout. A physical or occupational therapist, accessibility specialist, or qualified installer can help identify useful locations for reaching, turning, or transferring. A familiar bathroom may need more than one location to support different movements.
Conclusion
Make a monthly look at the grab bar part of your bathroom routine: inspect the grip, flanges, fasteners, and wall, then act on any movement, gap, rust, or water damage. If the mounting feels uncertain, stop relying on the bar and have the full installation checked.
A dependable grab bar is more than a polished curve on the wall. It is a small, steady link between a person and a familiar room—and a few careful minutes can help keep that link sound.