
TL;DR
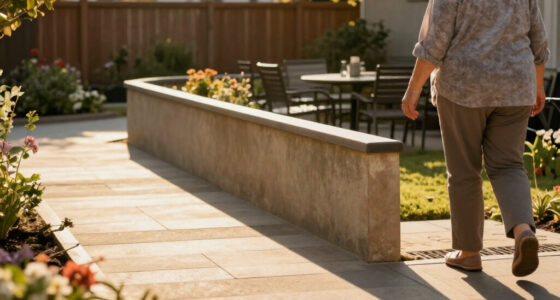
An accessible outdoor dining area connects a firm, stable route to usable tables, flexible seating, clear ordering options, and comfortable weather protection. In the United States, ADA standards generally call for accessible routes at least 36 inches wide and require at least 5% of dining surfaces, with a minimum of one, to be accessible; check local requirements for your setting. Keep the route clear during service, when chairs, queues, and temporary equipment can change the layout.
A patio can look roomy at noon and feel like a maze by dinner. One pulled-out chair, a planter, and a queue near the entrance can block the way to the table. Access depends on the whole journey, from the entrance to the seat, menu, and service.

Turn quiet afternoons into listening time
- Thousands of audiobooks, podcasts and originals
- Listen on your phone, tablet or Echo — also offline
- Cancel anytime
When you are setting up an accessible outdoor dining area, plan for people who use wheelchairs or walkers, older adults, families with strollers, and guests who need a quieter or more clearly lit place. You will find practical ways to plan the route, choose table spaces, make ordering work for more people, and keep the area usable when it gets busy. Rules differ by location, so use the measurements here as a starting point and confirm the standards that apply to your venue or home project.
Trace a continuous route from the accessible entrance or parking area to the dining table, then check for thresholds, loose surfaces, puddles, and obstructions.
In the United States, ADA standards generally call for accessible routes at least 36 inches wide; confirm applicable route and passing-space requirements local…
Provide accessible dining surfaces as required: under U.S. ADA standards, at least 5% of covered dining surfaces, with a minimum of one, must comply.
Test circulation with chairs pulled out and account for queues, heaters, umbrella bases, and serving equipment.
Keep printed or staff-assisted ordering available alongside digital menus, and recheck the layout during service.
Setting Up an Accessible Outdoor Dining Area
Access means a continuous, usable journey from the entrance to the table, menu, and service. Plan for changing layouts and check local requirements.
Plan the whole route
Trace the path from the accessible entrance or parking area to a usable table.
Look for loose gravel, slippery areas, puddles, and abrupt level changes.
Move furniture, planters, cords, signs, and queues out of the route.
Test the layout with chairs pulled out and staff moving through.
Make the table usable
A reachable table should let guests join their companions comfortably.
Clear floor space
Provide room to approach and pull up without moving heavy furniture.
Knee and toe clearance
Check that supports and table height leave usable space underneath.
Flexible choices
Offer chairs with backs and arms, plus spaces for wheelchair users to sit with their group.
Support ordering and comfort
Give guests more than one way to get information and service.
- Offer printed or large-print menus.
- Make staff assistance available.
- Use clear signage and respectful service.
- Provide shade and wind protection.
- Use lighting that supports visibility without glare.
- Consider quieter seating and manageable noise.
Start with a clear path all the way to the table
An accessible outdoor dining area starts with a continuous, firm, stable, slip-resistant route from the accessible entrance or parking area to a usable table. In the United States, ADA standards generally call for an accessible route at least 36 inches wide, though passing spaces and other conditions can affect what is required. Check local rules before you build or rearrange a public dining space.
Look at the whole trip rather than measuring only the patio. A route that crosses loose gravel, a raised threshold, or a sloped garden path may be difficult even if the dining area itself is flat. For example, if a guest comes from the driveway, map a line to the table and check where a gate latch, hose, or low step interrupts that line.
Surface matters under wheels, cane tips, and shoes. Firm paving or another stable surface is easier to use than shifting gravel, and small gaps or sudden changes in level can catch a wheel or walking aid. Rain adds another test: puddles and slick algae can make a route harder to use, so plan drainage and regular cleaning along with the paving.
On a restaurant patio, a menu board or delivery queue can slowly migrate into the path during a busy hour. In a backyard, it might be a planter placed near the gate. Keep the route visibly open, and walk it at different points in the day to catch changes that a one-time measurement misses.
Products Worth Considering

Dyson V8 Cyclone Cordless Vacuum

TCL 55 T7 Series 4K 120Hz QLED Smart Google TV (55T7)

Philips Hue Festavia 130-Foot Indoor/Outdoor Smart String Lights, 500 LEDs
As an affiliate, we earn on qualifying purchases.
Use these five checks to plan a patio layout
Plan the route, levels, tables, circulation, and upkeep together before you place furniture. A patio may look spacious on paper, but occupied chairs, umbrellas, and serving carts change how much room people can actually use. Work through the checks in order, then walk the layout as if guests were already there.
- Trace the route. Start at the entrance or parking area and follow the route to the table. Mark pinch points, thresholds, and places where water collects.
- Check level changes. Avoid abrupt thresholds and steep slopes. Where a ramp or landing is required, follow the applicable standards for its slope, landings, and handrails.
- Identify usable tables. Allow clear floor space and suitable knee and toe clearance at the tables intended for wheelchair users. ADA standards in the United States require at least 5% of dining surfaces to comply, with at least one accessible surface.
- Test the full circulation space. Pull chairs out as guests would and see whether anyone can still travel past. Include room for staff to serve without blocking the accessible route.
- Plan who will recheck it. Decide who moves a chair, queue barrier, heater, or temporary sign if it enters the route during service.
For instance, a family setting up an outdoor table can use painter’s tape to mark the route and chair positions before buying furniture. Then they can test the plan with the chairs pulled out. For a public venue, a simple diagram gives staff a shared reference when the patio changes with the season.
These checks are a planning aid, not a replacement for applicable accessibility standards. Requirements depend on the venue and location. A qualified accessibility professional or local authority can help interpret them for a specific project.
Choose tables where people can sit with their companions
Usable dining tables provide wheelchair space and enough knee and toe clearance, so a guest can join the group instead of sitting at an isolated spot. In the United States, ADA standards require at least 5% of covered dining surfaces, and no fewer than one, to meet accessibility requirements. The technical standards also specify surface heights and clear floor and knee space.
Table access takes more than an open patch beside a tabletop. A heavy pedestal or a low crossbar can block a person’s knees, while a table too low may not leave room for their legs. Picture a wheelchair user arriving with three friends: the route should reach a table where the group can sit together, with space to pull up without moving a heavy chair or asking strangers to rearrange furniture.
A mix of seating helps more guests choose a comfortable place. Some people prefer a chair with arms and a back; others may need a wheelchair space beside companions. If you host family meals at home, include a spot at the table that a wheelchair user can reach without shifting the whole setting. For a public patio, mark accessible spaces clearly for staff while keeping the layout welcoming and flexible.
Do not assume a table is usable because it appears to have open space beneath it. Check the table and the approach against the current requirements for your location. A small plan or on-site review can catch an obstructive support before the furniture arrives.
Leave room for occupied chairs and busy service
Measure circulation with chairs pulled out, not just the empty gap between table legs. Guests lean back, staff carry plates, and someone may need to pause or turn. A path that seems wide enough before service can narrow sharply once people sit down.
Try a practical rehearsal before opening a patio or hosting a large gathering. Place the tables, pull chairs out, and ask someone to carry a tray along the intended service path while another person moves through the accessible route. A restaurant might discover that a serving station creates a bottleneck; at home, a grill lid or cooler may take up the turning space beside the table.
Furniture that moves easily can help a space adapt, but the usable route and accessible tables must remain available as the layout changes. Agree on a basic placement plan and show staff which spaces cannot be filled with extra chairs. Keep heaters, umbrella bases, signboards, and queue markers out of the route. If a line forms for ordering, direct it away from the path to seated guests.
A quick check during service catches the slow drift of chairs and equipment. Access is an everyday condition, not just a feature of the empty patio. When one table needs to shift, staff should know where it can go without blocking another guest’s way.
Make menus and ordering work without a phone
Offer more than one way to read the menu and request service, because a QR code does not work for every guest. Some people may not use a smartphone, may find a small screen hard to read, or may need assistance placing an order. A printed menu, large-print option on request, and staff-assisted ordering can make the choice simpler.
For example, a guest at a family cookout might leave their phone inside, while another person may find it easier to read a large-print menu in good light. At a restaurant, staff can explain how to request help and check in without making assumptions about what a guest needs. A clear sign should say where to order or how to call a server, using wording people can understand quickly.
Digital menus can still be useful when their text is readable and the ordering steps work with assistive technology. The key is to keep an alternative available, so someone is not forced to rely on a personal device or a particular way of communicating. If a guest asks for help, offer it respectfully and let them direct what would be useful.
Good design also includes participation: guests should be able to choose food, ask a question, and dine with their group. A route to a table does not complete the experience if a person cannot comfortably order. Invite feedback and pay attention to recurring requests; they can reveal a practical barrier your layout drawing did not show.
Add shade, lighting, and quieter choices
Shade, manageable glare, steady lighting, and a quieter seating option can make an outdoor dining area more comfortable for a wider range of people. Sun and weather shift through the day, so a table that feels pleasant at lunch may become hot or dim by evening. Consider how the patio works at the times people actually use it.
A family setting up an accessible outdoor dining area might place the main table under a broad canopy, then check whether the canopy legs block the route. For a restaurant, adjustable umbrellas can offer shade while staff keep their heavy bases out of circulation. Wind protection can help with comfort, but it should not create a narrow passage or interfere with safe movement through the space.
Lighting should help people see edges, steps, menus, and faces without shining straight into their eyes. Glossy paving can catch low sunlight, while bold, busy patterns may make boundaries harder for some guests to read. A matte surface and steady, even lighting can feel calmer and make a patio easier to use after dusk.
Noise is part of the setting too. The table closest to a busy road or speaker may not suit every guest, so offer a choice when the layout allows it. Flexible comfort matters: the same person may prefer sun in the morning and shade at dinner, or a livelier table on one visit and a quieter corner on another.
Keep the patio accessible after you open it
Recheck the route and usable tables throughout service, since movable furniture and queues can quickly change the layout. An accessible entrance at opening time does not guarantee an accessible journey later. Assign someone to notice obstructions and move them promptly.
A short opening check can include the path, table approach, signs, heaters, and queue position. During a busy meal, staff can look again after a large group arrives or tables shift. At home, a family host can check after bringing out extra chairs or setting down a cooler. The routine need not be elaborate; the point is to catch a blocked route while it is easy to fix.
Ask disabled guests, family members, or staff what feels awkward, and listen without making them responsible for designing the solution. A guest may point out that a chair blocks the approach, or that the only shaded table is difficult to reach. That feedback can show you where the floor plan and lived experience differ.
Rules depend on location, venue type, and whether the patio uses public space. In the United States, restaurants and other public accommodations may have obligations under the ADA, and temporary status alone does not automatically remove accessibility requirements. Check applicable building rules and permits with the relevant local authority. Keep compliance and daily usability in view as weather, furniture, and capacity change.
Frequently Asked Questions
How wide should an accessible patio path be?
In the United States, ADA standards generally call for an accessible route at least 36 inches wide, with added requirements for passing spaces and certain conditions. Local codes may differ or call for more, so check the rules for your venue before setting the layout.
How many accessible tables does a restaurant patio need?
Under U.S. ADA standards, at least 5% of covered dining surfaces, and no fewer than one, must be accessible. The table also needs the required clear floor space and knee and toe clearance, with an accessible route to reach it.
Does a temporary outdoor dining area need to be accessible?
Temporary status alone does not automatically remove accessibility obligations. Requirements depend on the venue, location, and use of public space, so check the applicable standards and permit conditions with the relevant authority.
Can a wheelchair user sit at any patio table?
Not necessarily. Some tables may lack clear floor space or room for a person’s knees and toes, and the route to a table may be blocked. Plan accessible places where guests can sit with their companions, and verify the details against local standards.
What makes outdoor dining flooring easier to use?
A suitable surface is generally firm, stable, and slip-resistant, with manageable slopes and no problematic gaps or abrupt changes in level. Consider what rain, wear, and drainage do to the surface over time, not only how it looks when dry.
Are QR-code menus enough?
A QR code can be one useful option, but it will not work for everyone. Keep another way to read the menu and order, such as a printed menu or staff assistance, so guests can choose the option that suits them.
Conclusion
Start with one simple walk: follow the route from the entrance to the table, then imagine the chairs occupied and the patio busy. Fix the spots that interrupt the journey, and confirm the measurements and rules that apply where you live or operate. A welcoming outdoor table is one people can reach, use, and share with their companions.
When the path stays clear and the welcome stays warm, the evening can belong to everyone: plates clinking, leaves stirring overhead, and conversation circling the table.