TL;DR

Turn quiet afternoons into listening time
- Thousands of audiobooks, podcasts and originals
- Listen on your phone, tablet or Echo — also offline
- Cancel anytime
For safe evening patio use, light the walking routes, steps, level changes, gates, and entrances first. Add separate, well-aimed lights for dining or grilling, choose outdoor-rated fixtures, and use controls that make the setup easy to operate without glare or excess brightness.
The patio door clicks shut behind you, and the familiar path to the table suddenly looks different. A step that was obvious in daylight blends into the paving; a dark watering can becomes an obstacle. Thoughtful patio lighting helps you see those changes while keeping the evening calm and welcoming.
This guide shows you how to plan routes, steps, and gathering areas before choosing fixtures. You’ll also learn how to reduce glare, compare solar and wired options, and set up controls that make the lights easier to use after dark. The aim is simple: enough light to move with confidence, without turning your patio into a floodlit parking lot.
Light the route, step edges, level changes, gate, and entrance before adding decorative patio lights.
Use separate general, task, and accent lighting so one bright fixture doesn’t create harsh shadows.
Check solar lights in their actual location and season before relying on them for a frequently used route.
Aim fixtures down, reduce glare, and use timers or zones to keep light comfortable for neighbors.
Choose outdoor-rated equipment and consult a qualified electrician for mains-wired work when needed.
Lighting a Patio for Safe Evenings
Make routes, steps, and entrances easy to read first. Then layer comfortable light for dining, grilling, and relaxing—without glare or needless brightness.
Light the way people actually walk
At dusk, walk the route in both directions. Mark where paving changes to decking, where a step begins, and where gates, edges, or obstacles disappear.
A route that reads clearly
Let each pool of light lead naturally to the next. Check from both directions, and clear hoses, chairs, and planters from the walking line.
Give each light a clear job
A single bright fixture can cast hard shadows behind people and furniture. Separate layers let you direct useful light where it belongs and keep the seating area comfortable.
General
Provide an even, comfortable base around the table or seating area so people can move and socialize.
Task
Focus light on the grill, food preparation surface, or menu without shining into diners’ eyes.
Accent
Add a modest glow to a planter, wall, or shrub. Keep it subtle and aim it away from windows and the sky.
See clearly without the squint
There is no single ideal brightness. Provide enough light to navigate and do the task, then adjust the setting for comfort and the neighbors around you.
Comfort check
Build a usable setup
Illustrative balance, not a brightness specification. Use separate switches or zones, compatible dimmers, timers, or motion sensors to fit how your household uses the patio.
Choose the source for the job
Compare real-world brightness, runtime, weather resistance, and replaceable parts. Product performance varies, especially for solar lights in shade or short winter days.
Solar
Convenient for path markers and accents where daylight reaches the panel. Test in the actual location and season before relying on it for a frequently used route.
Low-voltage LED
Can suit a coordinated set of route or garden lights. Use compatible fixtures and power supplies, and plan for the conditions at your home.
Mains-wired
Can provide reliable illumination. Outdoor wiring and outlets must meet local requirements; use a qualified electrician when the work calls for it.
Keep the patio clear, calm, and easy to use
Start with the route, then add the smallest amount of well-aimed light that makes each activity comfortable. Review the setup after dark, adjust the beam or position, and check fixtures, bulbs, sensors, and connections periodically.
Light the route before you decorate the patio
Lighting a patio for safe evenings starts with the route you walk. Make the path from the door to the seating area visible, then mark steps, changes in level, gates, and edges. People need to recognize where the walking surface begins and ends, not stare into a bright bulb to find their way. Seeing the shape and boundary of the route helps you judge where to place your feet; a bright patch surrounded by darkness can make those boundaries harder to read.
Take the route at dusk with someone who uses it often. Notice where paving changes to decking, where a step begins, and whether a plant pot or chair leg sits in the way. For example, a low, shielded light beside the back step can reveal its edge while keeping the beam off your face. A gate latch may need a small nearby light, especially if you regularly carry a bag or hold a handrail. Check the route from both directions, since a step that stands out when approached from the door may disappear when you return from the garden.
Think of route lighting as a quiet handrail made of light: it gives your eyes a clear path to follow. Low-level path lights, step lights, or downward-facing wall fixtures can help mark the walking surface. Space and aim fixtures so one pool of light leads naturally to the next. A bright lamp at the far end with a dark gap in between can make the route harder to read, while lights placed too close together or aimed at eye level can create glare and distracting bright spots.
Keep the walking area clear as well. A light can reveal a hose, but moving the hose after watering is better. If a family member visits at night, walk the route together and ask where the edges still disappear. That short check can show you exactly where another light—or a simpler furniture arrangement—would help. Lighting improves visibility, but it cannot make a cluttered route as easy to use as a clear one.
Products Worth Considering
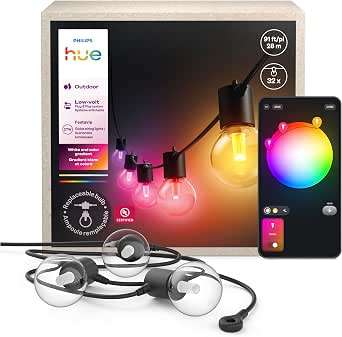
Philips Hue Festavia Globe Outdoor String Lights, 32 Bulbs, 91 ft

Philips Hue Bridge Pro Smart Lighting Hub

Philips Hue Secure Wired Video Doorbell, 2K Resolution, Wide Angle View, Integrated Hue Lights, Two-Way Audio, Infrared Night Visibility, Bl
As an affiliate, we earn on qualifying purchases.
Use three gentle layers for a patio that feels welcoming
Lighting a patio for safe evenings works best in layers: general light for the gathering area, focused light for tasks, and softer accent light for features. Each layer serves a different purpose, so you can see enough without relying on one overpowering fixture. A single bright light often throws hard shadows behind chairs, planters, and people. Those shadows can hide edges and make the scene feel less comfortable, even when the overall light seems strong.
Start with general lighting near the table or seating area. Add focused light where you read a menu, prepare food, or use the grill. Then consider a modest accent light for a wall, large planter, or leafy shrub. For instance, a wall light can softly brighten the table while a separate shielded fixture points toward the grill. A small accent near a favorite potted fern may give the patio a warm, lived-in feel. Keeping these jobs separate means you can direct useful light onto a work surface without making everyone at the table look toward a bright source.
Separate switches or controls make these layers useful in real life. When you eat outside, you may want the table light and route lights on; when you sit and talk, you may prefer a softer setting with the route still visible. Zones let you match the light to the activity. Dimmers can help, but only when the fixtures and controls are compatible. More zones add flexibility, though too many switches can be confusing; group the controls around the choices your household actually makes.
Try the setup from the seat you use most. If the light makes you squint or shines directly into your eyes, adjust its position, add a diffuser, or choose a shielded fitting. The goal is a patio that feels like a warm room with open air, not a stage with a spotlight. A comfortable balance often comes from lowering or redirecting a source, rather than adding more light to compensate for shadows.
Choose solar, low-voltage, or mains lights for the right job
Lighting a patio for safe evenings may call for different power sources in different places. Solar fixtures can be handy for path markers and accents, while low-voltage or mains-wired lights may suit areas that need dependable illumination. Your choice depends on exposure to sun, weather, installation needs, and how often you use the space. A route light that needs to work every evening has a different job from an accent light that is pleasant when it happens to be bright.
Solar lights need enough daylight to charge, and their brightness and runtime can vary with shade, season, battery capacity, and product quality. A small solar marker might help outline a flower bed but leave a step difficult to see after a cloudy day. Before relying on one for a route, check its performance in the actual spot and during the hours you use the patio. If output drops when winter days are short or a nearby tree casts shade, you may need a different position or a more dependable source for that part of the route.
Low-voltage LED systems are a common outdoor option and generally use less energy than many older lighting technologies. They can suit a planned set of route or garden lights, but require compatible equipment and a suitable power supply. Mains-wired fixtures can provide reliable light, but permanent outdoor electrical work needs to follow local requirements. Use a qualified electrician when the job involves wiring or outdoor outlets and you’re unsure what the installation requires. The convenience of a DIY setup should be weighed against how exposed the location is and whether the installation is appropriate for outdoor conditions.
Compare the details that affect daily use, not just the marketing headline. Check the outdoor rating for the fixture’s location, the stated light output in lumens, expected runtime for solar products, and whether batteries or other components can be replaced. Choose for the conditions at your home. A sheltered, sunny corner and a damp, shaded path have different demands. A replaceable battery may extend a solar fixture’s useful life, while an easily accessible switch can matter more than a high output figure if the light is awkward to operate.
Pick brightness and color that help you see without glare
Lighting a patio for safe evenings doesn’t mean making every corner equally bright. Use enough light to navigate and handle tasks, then keep social areas softer. There’s no single brightness level that suits every patio: the needed output depends on fixture placement, surface color, the activity, and personal comfort. The aim is useful contrast, so route edges and objects are distinguishable without making the brightest spot dominate everything around it.
LED brightness is usually described in lumens, while wattage describes energy use. That means a low-wattage LED can still produce useful light, so wattage alone won’t tell you how bright a fixture will feel. If possible, try one light before installing several. A pale stone wall may reflect light across a seating area, while a dark fence can absorb it and leave the far edge dim. This is why a fixture’s listed output does not predict exactly how the whole patio will look: direction, distance, and surrounding surfaces change the result.
Color also shapes the mood. Many people prefer warm white for relaxing outdoors; cooler light can make details appear sharper but may feel harsher in a quiet seating area. The best choice depends on the setting and your preference. For example, you might choose warm light by the table and a more focused task light at the grill, where seeing food clearly matters. Using different color temperatures can be helpful, but a large mismatch between nearby fixtures may make the patio feel visually unsettled, so compare them together before committing.
Glare can make a bright patio less comfortable. Aim fixtures down or toward the surface they need to light, and avoid positions where seated guests look straight into the bulb. Shielding and diffusers soften the view. If you notice sharp dark patches between fixtures, adjust their direction or add modest light where the shadows fall. A diffuser can improve comfort, though it may reduce the light reaching the surface; check the result where you need to walk or work instead of judging by the appearance of the fixture alone.
Set up controls that make evening lighting easy to use
Lighting a patio for safe evenings is more useful when you can turn on the right lights easily. Separate switches, dimmers, timers, and motion sensors help match illumination to your routine. The best control is one you can reach and understand without searching for an unfamiliar app in the dark. Controls affect safety as well as convenience: if the route light takes several steps to activate, it may be less useful at the moment you need it.
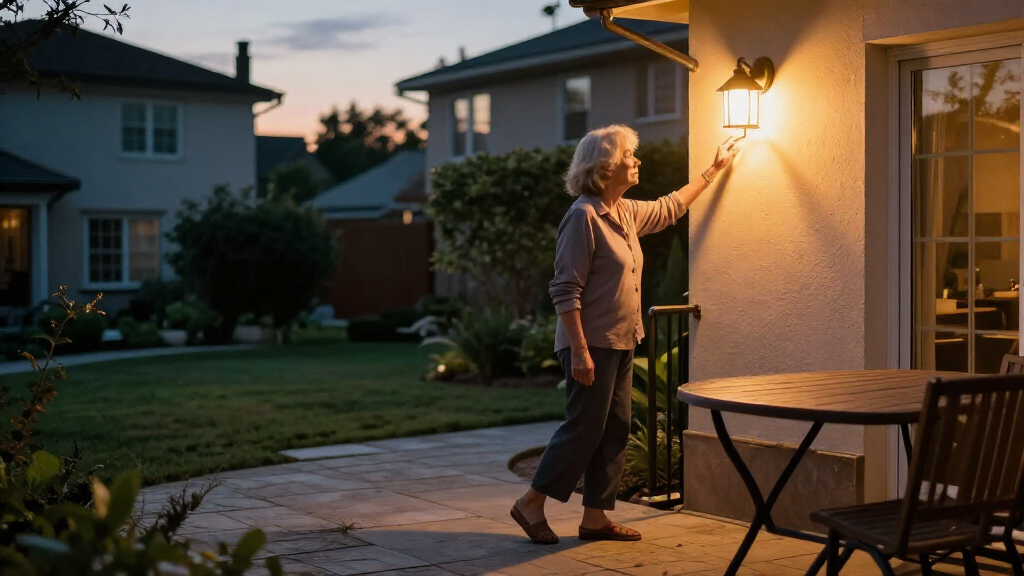
Consider what happens when you step outside with a cup of tea or return from the garden with your hands full. A switch near the door can turn on the route lights before you leave the house. A timer can turn off decorative lighting later in the evening, while a motion sensor near a side gate can provide light when someone approaches. Each feature should suit how your household actually moves. A sensor can save the trouble of finding a switch, but a short timeout or poor sensor position may leave someone in darkness before they finish crossing the patio.
Controls can also help keep light comfortable for neighbors. If a fixture shines into a nearby bedroom window, try aiming it down, adding a shield, or setting a timer. Use only the light needed for the activity and switch it off when the patio is empty. That keeps a bright beam from lingering across the fence long after the conversation ends. Dimming or timing can reduce spill, but correcting the fixture’s direction is usually the more direct way to stop light reaching a window.
Before settling on a setup, test it during an ordinary evening. Ask a family member to operate the controls while carrying a plate, or try reaching the switch from a seated position if that reflects how you use the patio. Simple controls support independence. A clearly labeled switch beside the door may be more practical than a complicated control system, though smart controls can be useful when set up to fit your habits. Choose a setup that remains understandable if a phone is unavailable or another household member needs to use it.
Keep fixtures working through rain, dust, and changing seasons
Outdoor lighting must suit the weather where you install it. Rain, humidity, dust, wind-blown moisture, and temperature changes can affect a fixture even under a roof. Check the manufacturer’s instructions and outdoor rating for the exact location rather than assuming a covered patio protects indoor fixtures. A rating describes suitability for particular exposure; choosing for the actual spot helps reduce the chance that moisture or dust will interfere with operation over time.
A covered ceiling may stay dry in a light shower but still collect damp air or take on rain blown in from the side. A light near a hose or watering can may face splashes. For example, a fixture beside a garden door needs to suit the exposure there, even if the patio table sits beneath a deep awning. Assessing each position separately matters because one patio can include both sheltered and exposed areas.
Simple upkeep helps you spot problems early. Periodically wipe dust and cobwebs from the fitting, check that sensors still respond, and replace bulbs or batteries according to the instructions. If a path light has shifted into a plant bed, reposition it so its beam falls on the walking surface again. Keep cables and connections in good condition, and seek qualified help if a wired fixture or outlet appears damaged. Dirt can weaken light output, while a shifted fixture can send its beam away from the route, so a quick visual check helps preserve the original layout’s purpose.
When planning a new installation, account for the full route and the controls as well as the fixture itself. A well-placed light can be more useful than several poorly aimed ones. Follow local electrical requirements for outdoor work, and consult an electrician when mains wiring is involved or the right approach isn’t clear. That leaves you with a setup designed for your home’s real conditions.
Make a simple evening lighting plan in five steps
You can plan patio lighting by walking the space, marking the dark spots, and testing one change at a time. A short evening review helps you spend effort where it improves visibility and comfort. It also gives everyone who uses the patio a chance to point out a difficult step or an awkward switch. Starting with the highest-priority route issues helps avoid spending time on decorative lights while a useful walking edge remains hard to see.
- Walk the route at dusk. Start at the door and go to the table, garden gate, and any other regular destination. Note steps, level changes, and obstacles. Look from both directions and at the times you expect to use the patio, since shadows and available daylight change.
- Light the walking surfaces. Choose a position for shielded path or step lights that reveals edges without shining into people’s eyes. Favor a clear sequence of visible surfaces over isolated bright points, and check that the light reaches the step rather than only the wall beside it.
- Add task light where you need it. Test the table, grill, or potting area separately from the general seating light. This shows whether the task needs a focused source and lets you avoid making the entire patio brighter than necessary.
- Check comfort from a chair. Sit where people gather and look toward each fixture. Redirect any beam that feels harsh or lands in a neighbor’s window. Check whether the change still leaves enough light on the route when someone stands up or walks away from the table.
- Test controls and upkeep. Try switches, timers, or sensors during a normal evening, then schedule occasional checks for dirt, batteries, and aim. A control that works only when a phone is nearby may not suit everyone, so confirm that each person who uses the patio can operate the lights.
For example, a household might find that the back step and dark gap beside the table need attention, while the decorative string lights are already bright enough. That observation gives a clear order: mark the step, soften the gap, and leave the decorative layer alone. Small, targeted changes can make the patio easier to move through without changing its character. Testing each adjustment separately also helps you tell whether it solved the problem or simply moved the shadow somewhere else.
Involve the person who uses the route most. A caregiver may notice a loose cable; the person who sits outside every evening may know that a particular bulb feels too bright. Their experience can shape a plan that feels practical and respectful. What looks bright from the doorway may still feel uncomfortable from a chair, so the people using the space should help judge the result.
Frequently Asked Questions
How bright should patio lighting be?
There isn’t one brightness that fits every patio. Use enough light to see routes and carry out tasks, then dim or switch off layers that feel too bright. Check LED output in lumens, and judge it from the places where you walk and sit.
Are solar lights bright enough to mark a patio path?
Solar lights can work well as path markers or accents, but their output and runtime depend on sunlight, battery capacity, weather, and product quality. A shaded fixture may not perform like one in a sunny spot. Test it in place before relying on it for a frequently used route.
Can I use indoor lights on a covered patio?
Use a fixture only if its rating and manufacturer instructions suit the conditions where it will be installed. A roof may not block humidity, wind-blown rain, or temperature changes. Check the rating for that location before fitting the light.
How can I stop patio lights from shining into a neighbor’s window?
Aim lights downward, use shielded fittings, and lower the brightness or add dimming where possible. Timers and motion controls can limit how long a light stays on. If a beam still reaches a window, reposition or shield the fixture.
Do I need an electrician to install patio lights?
Battery and plug-in products may be straightforward to set up, depending on the product and local requirements. Mains wiring, outdoor outlets, and permanent electrical work should meet local codes. Consult a qualified electrician when the installation involves wiring or you’re unsure what is required.
Conclusion
Start with the path you walk most often. Mark the steps and edges, add comfortable light where you gather, and test every fixture from both standing and seated positions. That simple order can make the patio easier to move through while preserving the quiet feel of an evening outdoors.
When the lights come on, you should see the route clearly and still notice the soft green of leaves against the darkening sky. Let that be your guide: clear underfoot, gentle to the eyes, and ready when you need it.