
How to Make a Patio Slip-Resistant
AIThis post was created with the assistance of artificial intelligence (AI).

TL;DR

For listenersOffer from Amazon

Turn quiet afternoons into listening time

  • Thousands of audiobooks, podcasts and originals
  • Listen on your phone, tablet or Echo — also offline
  • Cancel anytime
Try Audible free Free trial for new members
As an affiliate, we earn on qualifying purchases.

To make a patio slip-resistant, remove leaves, algae, moss, grease, and cleaner residue, then fix pooling water and maintain the paving regularly. Textured surfaces and compatible anti-slip treatments can improve grip, but results depend on the material, weather, slope, and upkeep; no patio is completely slip-proof.

A patio can look clean and still turn slick after a night of rain. A thin green film, a scatter of wet leaves, or water sitting in a shallow dip may be all it takes to change how the paving feels underfoot. If you share the space with an older relative, a child, or anyone who prefers steady footing, those small details deserve attention. You can make a patio more slip-resistant by tackling the cause of the slickness first, guiding water away, and keeping the surface in good shape. This guide explains how to clean different paving carefully, when a treatment may help, what to check before sealing, and how to keep steps and paths easier to use. It also covers the limits: a safer patio is a practical goal, while a completely slip-proof surface is not.
At a glance
How to Make a Patio Slip-Resistant: Practical Guide
Key insight
A coating can lose effectiveness through weather, cleaning, and foot traffic, so an anti-slip treatment needs ongoing maintenance and may need reapplication according to its product instructions.
Key takeaways
1

Remove algae, moss, grease, leaves, and cleaner residue before adding any treatment.

2

Use a cleaner approved for your paving, rinse thoroughly, and use pressure washers cautiously.

3

Clear drains, observe puddles after rain, and address persistent low spots or slopes.

4

Compare wet-use information and finish texture when choosing new paving; no material is automatically safest.

5

Test treatments in a hidden area and check product compatibility, appearance changes, and maintenance instructions.

6

Keep routes clear and repair loose pavers, uneven edges, and other hazards.

Step by step
1
Stop puddles from returning after every shower
A patio stays safer in wet weather when water drains away instead of pooling on the walking surface.
How to Make a Patio Slip-Resistant

Outdoor safety · Practical guide

How to Make a Patio Slip-Resistant

A patio can look clean and still turn slick after rain. Find and remove the cause, help water drain away, and choose surface care that fits your paving.

Start here Find the cause Growth, grease, residue, or water
Daily habit Sweep promptly Remove leaves and loose grit
Main check After rain Look for lingering puddles
Realistic goal More resistant No patio is slip-proof

TL;DR

Remove leaves, algae, moss, grease, and cleaner residue; then deal with pooling water and maintain the paving regularly. Textured surfaces and compatible anti-slip treatments may improve grip, but performance depends on material, weather, slope, and upkeep. No patio can be made completely slip-proof.

First, find what is making it slick

Different causes call for different fixes. Inspect in daylight, sweep away loose debris, then check the damp or slippery spots again.

Organic growth

Algae & moss

Green or dark film often returns where shade and moisture linger, such as beside garden beds.

Spills & residue

Grease & leaves

Food spills, cooking grease, and wet leaf residue can make a textured surface feel slick.

Water

Puddles & damp shade

Standing water leaves paving wet and can encourage organic growth to return.

Walk the patio after a steady rain

Notice where water remains, which areas dry last, and whether the slick patch has an obvious source.

  • Look for green or dark patches
  • Check beneath tables and grills
  • Clear leaves from corners and drains
  • Note loose pavers and uneven edges

Clean carefully, rinse completely

Use a cleaner approved for your paving material. Detergent left behind can form a film that feels slippery when damp.

01

Clear debris

Sweep away leaves, soil, and loose grit from the surface and joints.

02

Check material

Identify concrete, brick, or stone and choose a compatible cleaner.

03

Follow the label

Use the stated dilution, contact time, scrubbing method, and precautions.

04

Rinse well

Rinse each manageable section before the cleaner dries.

05

Inspect dry

Let the paving dry and check the result in good light.

Pressure washer

Use a suitable setting and follow maker guidance. Excessive pressure can erode concrete, damage softer stone, or dislodge jointing material. Ask a professional before washing delicate or valuable stone.

Help water move away

Good drainage helps reduce lingering wet patches and the conditions that let slick growth return.

After rain · quick check

Follow the water’s path

Clear leaves from drains and channels, and trim plants that keep paving shaded and damp. Note shallow puddles, blocked edges, and the areas that dry last.

If water pools because paving has settled or the patio slopes toward the house, ask an experienced paving contractor about correcting levels and drainage. Changes can affect thresholds and water flow.

Keep up seasonal care

  • Sweep leaves and grit regularly, especially after storms.
  • Recheck shaded areas after rain and during growth-prone seasons.
  • Clear drains before water starts pooling.

Check the whole route

Steps & slopes Check traction, transitions, and changes in height.
Paving Repair loose pavers and uneven or unstable edges.
Walkways Keep routes clear so obstacles do not add fall hazards.

Choose paving for the setting

Textured or naturally cleft finishes generally offer more grip than highly polished finishes. Material names alone cannot predict wet performance: consider texture, slope, exposure, contaminants, and maintenance.

Surface feature What it may mean outdoors What to check
Textured or naturally cleft Small surface variations may provide more grip than a polished face. Ask about wet-use information and how the texture feels underfoot.
Highly polished A smooth face may become slick when wet or contaminated. Consider another finish for exposed paths and seating routes.
Sloped or uneven Water may cross a walking line; an edge may catch a foot. Check drainage, level changes, and stability as well as texture.
When replacing paving: Ask the supplier for relevant wet-use test information and how it applies to your setting. Testing methods and local building or accessibility guidance can differ; check current local requirements.

Use treatments selectively

Coatings, penetrating treatments, and etching products work differently. They are not interchangeable or suitable for every surface.

Surface coating

Can add a textured layer

Check outdoor suitability, compatibility with the paving, expected traffic, and maintenance needs.

Confirm product fit
Penetrating product

May alter surface grip

Follow instructions for the exact stone or concrete and exposure. Test a hidden area first.

Test appearance
Etching product

Changes the surface

Use only when explicitly suitable; check application steps and the resulting finish.

Read the label
Before you seal

Check the finish twice

Some sealers create a smoother film, especially if applied too heavily or to already smooth paving. Choose a sealer intended for outdoor use and ask whether it works with an anti-slip additive or textured finish.

Test an inconspicuous spot first: treatments can change color, texture, or gloss. Weather, cleaning, and foot traffic can reduce effectiveness, so follow reapplication guidance.

A steadier patio is a connected routine

Each action supports the next. If a surface stays slick after cleaning and drainage checks, seek advice suited to the paving.

01 · Remove

Clear contaminants

Remove organic growth, grease, leaves, and cleaner residue before considering a treatment.

02 · Redirect

Address water

Clear drains, observe puddles, and get advice for persistent low spots or slopes.

03 · Maintain

Keep checking

Choose compatible materials and products, then inspect routes and renew care as directed.

Common questions

What is the best first step?

Remove organic growth and residue, rinse well, and address standing water. If slipperiness persists, consider a compatible treatment or professional advice.

Does sealing make a patio slippery?

It can. Some sealers create a smoother film. Choose one intended for outdoor paving and check compatibility with anti-slip additives or a textured finish.

Can I use a pressure washer?

Often, but match the setting and nozzle to the material. Too much pressure can damage paving or joints; follow manufacturer guidance.

Are anti-slip treatments permanent?

Usually not. Weather, cleaning, and foot traffic can reduce their effect. Follow product maintenance and reapplication instructions.

Remember: Slip resistance depends on surface, footwear, water or contaminants, slope, and upkeep. Aim for better grip and easier maintenance, not a guarantee of safety in every condition.

Find the film, puddle, or residue making your patio slick

A patio becomes slippery when water combines with something on the surface, such as algae, moss, leaf residue, grease, or leftover detergent. Start by finding the cause: look for green or dark patches, slippery spots near a grill, leaves trapped in corners, and puddles that linger after rain. Cleaning without fixing the source can make the surface look brighter for a day while the slickness returns. For example, the paving beside a garden bed may stay shaded and damp long after the rest of the patio dries. A green film there points to persistent moisture and organic growth. By contrast, a slick patch under a dining table might come from spilled food or cooking grease. Each calls for a slightly different cleanup, so a quick inspection helps you choose the right approach. A useful way to think about it: the surface is a raincoat, and contaminants are a layer of wax on top. Even textured paving can lose grip when that layer fills its small grooves. Sweep away loose leaves and grit first, then inspect again in daylight. A resistant patio is usually the result of several habits working together, starting with removing whatever is making your paving slick.

Products Worth Considering

Philips Hue Festavia Globe Outdoor String Lights, 32 Bulbs, 91 ft

Philips Hue Festavia Globe Outdoor String Lights, 32 Bulbs, 91 ft

Bose TV Speaker (2nd Gen) Compact Soundbar with Bluetooth and HDMI

Bose TV Speaker (2nd Gen) Compact Soundbar with Bluetooth and HDMI

As an affiliate, we earn on qualifying purchases.

Clean the paving without wearing away its surface

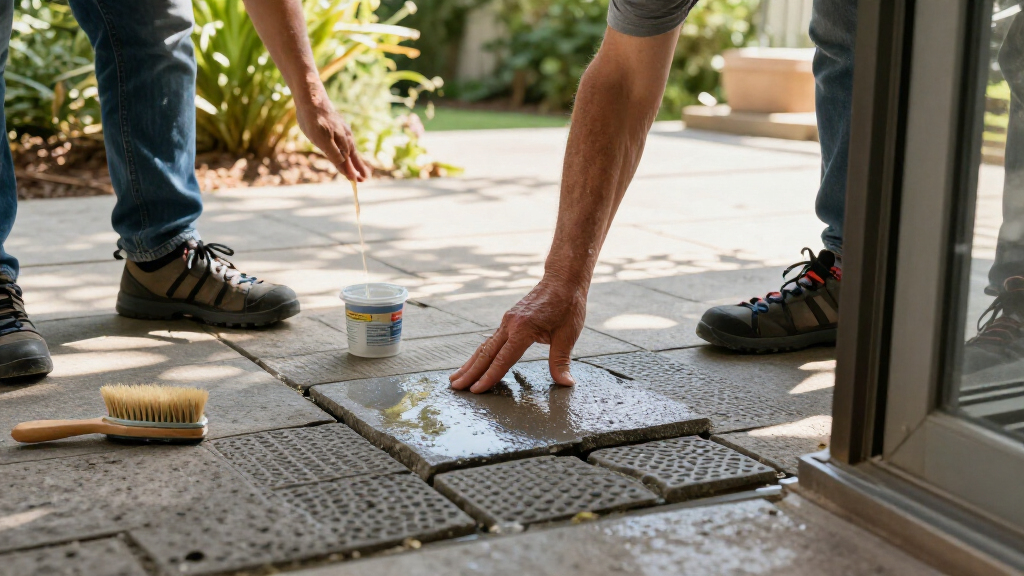
To make a patio slip-resistant through cleaning, sweep away debris, use a cleaner approved for the paving, scrub as directed, and rinse thoroughly so no slippery residue remains. Read the cleaner label before you begin; products suited to concrete may not suit every natural stone or finish. If you have a small patio, divide it into manageable sections so each area gets a thorough rinse before the cleaner dries.
  1. Clear the surface. Sweep leaves, soil, and loose grit away from corners and joints.
  2. Check the material. Identify whether the paving is concrete, brick, or stone, and choose a compatible cleaner.
  3. Apply as directed. Follow the label for dilution, contact time, scrubbing, and any precautions.
  4. Rinse completely. Detergent left behind can form a film that feels slick when damp.
  5. Let the area dry. Inspect the result in good light before deciding whether another step is needed.
Imagine cleaning a stone patio before a family lunch. A mild cleaner and a careful rinse may be enough for ordinary dirt, while a stubborn algae patch may need a surface-specific treatment. A pressure washer can help on some paving, but high pressure can erode concrete, damage softer stone, or dislodge jointing material. Use the paving maker’s guidance and a suitable setting; if the stone is delicate or valuable, ask a professional before washing.

Stop puddles from returning after every shower

A patio stays safer in wet weather when water drains away instead of pooling on the walking surface. Check where rain collects, whether drains or channels are blocked, and whether nearby plants keep the paving in shade. Cleaning removes slick growth, but standing water can invite it back and leave an already smooth area damp underfoot. Try this simple check after a steady rain: notice which parts dry first and where water remains. A shallow puddle near the back door may point to a low spot; water along an edge may indicate a blocked channel. Clear leaves from drains and trim plants that press over the paving. Small maintenance steps can make a noticeable difference, especially in a shaded corner where the sun rarely reaches. If water collects because paving has settled or the patio slopes toward the house, the fix may involve lifting or regrading sections. That work can affect thresholds and drainage, so get an experienced paving contractor’s advice before changing levels. For example, a family may find that a channel drain is hidden beneath fallen leaves each autumn; clearing it after storms can prevent recurring puddles without altering the patio. Good drainage is a quiet helper: it moves water out of the way before it can settle in.

Choose paving with grip that suits your outdoor space

Textured or naturally cleft finishes generally offer more grip than highly polished finishes, but a material name alone cannot tell you how it will perform when wet. Texture, slope, water, contaminants, and maintenance all affect traction. When choosing new paving, compare information for the intended outdoor use and local conditions instead of assuming one stone or finish is always safest.
Surface featureWhat it may mean outdoorsWhat to check
Textured or naturally cleft finishSmall surface variations can provide more grip than a polished face.Ask how it performs when wet and how its texture feels underfoot.
Highly polished finishA smooth face may become slick when water or residue is present.Consider another finish for exposed paths and seating routes.
Sloped or uneven pavingWater may run across a walking line, or an edge may catch a foot.Check drainage, level changes, and stability as well as texture.
Suppose you are replacing a small patio beside a garden door. You might prefer a gently textured finish along the main route, while choosing a complementary look for a covered seating area. Ask the supplier for relevant wet-use test information and how it applies to your setting. Product testing methods and local building or accessibility guidance can differ, so check current local requirements. A surface that works well for a level, sheltered terrace may be a poor match for a shaded, sloping path.

Use anti-slip treatments carefully, especially before sealing

An anti-slip treatment can improve grip on some existing patios, but its suitability depends on the paving, outdoor exposure, and foot traffic. Coatings, penetrating treatments, and etching products work differently; they are not interchangeable. Check the label for the exact surface and setting, and test a small hidden spot before treating a larger area. Some products can change color, texture, or gloss. Sealing deserves the same care. Some sealers create a smoother film, especially when applied too heavily or over already smooth paving. If you want a sealer, choose one intended for outdoor paving and ask whether the manufacturer approves an anti-slip additive or textured finish. Never assume an additive works with every sealer; the products may not be compatible. For instance, a homeowner may apply a glossy sealer to make a patio easier to clean, then notice that the wet surface feels slicker. A compatible texture additive could be an option, but only if the product makers confirm it suits that paving and sealer. Follow application, drying, and reapplication instructions closely. If the patio is a costly natural stone, has a warranty, or has a finish you want to preserve, professional advice can help you avoid an unwanted change.

Keep grip from fading through the seasons

Regular, modest upkeep helps prevent leaves, dirt, and organic growth from building into a slick layer. There is no single cleaning schedule for every patio: shaded, damp, or heavily used areas may need more attention than a sunny, sheltered terrace. Sweep regularly and clean when debris or growth accumulates, then check the damp spots after rain. Think of autumn leaves near the patio door. If they sit wet for several days, they can leave dark residue that is harder to remove later. A quick sweep after windy weather takes less effort than a deep scrub once the paving has turned green. In spring, inspect joints and edges for loose paving or material that has washed away. During winter, watch for water that freezes in a low spot; follow local guidance for safe ice management and avoid products that could damage the paving. Treatments also need care over time. Weather, cleaning, and foot traffic can reduce their effect, so check the product’s maintenance and renewal directions. A family that uses the patio daily might make a brief check part of its weekly garden routine: sweep the route, clear the drain, and look for new slick patches. That small habit keeps changes visible before they become a bigger repair.

Check steps, edges, and walking routes as well as the surface

Better surface grip helps, but steps, slopes, loose pavers, and abrupt height changes can still make a patio harder to cross. Walk the route from the house to the seats, garden, or bins and look at the whole path, not just the paving finish. Keep it clear of hoses, pots, tools, and trailing plants, especially where someone turns or steps down. Picture a caregiver carrying a cup of tea to an older family member seated outside. A loose paver near the doorway can shift even on a clean, textured patio; a hose curled beside a step can catch a foot. Repair unstable paving, mark or improve abrupt level changes as appropriate, and keep the walking line open. If the patio includes a slope, consider how rain moves across it and whether a handrail or other accessibility improvement is appropriate for the household. These changes are about making everyday use more comfortable and predictable, not taking the patio away from anyone. Ask the person who uses the space what feels awkward: perhaps the route is too narrow for a walking aid, or a pot blocks the easiest turn. If drainage repairs, paving levels, or accessibility changes are substantial, consult a qualified contractor or relevant local professional. The best fix often comes from noticing how the patio is actually used.

Know when a professional can save you time and rework

Get specialist advice when the paving is damaged, drainage problems are substantial, or a treatment could affect a valuable surface or warranty. A professional can help identify whether the problem comes from the finish, a recurring moisture source, loose joints, or an unsuitable coating. That matters because applying a new product over the wrong surface can change its appearance without solving the underlying issue. For example, if water repeatedly pools beside a doorway after you clear the drain, the patio may have a level or grading problem. A paving professional can assess the cause and explain options before you pay for a surface treatment that will not address it. If you are considering an etching product on delicate stone, ask the stone supplier or a qualified installer whether the treatment is appropriate. Bring clear details to the conversation: the paving material if known, where the surface becomes slick, when puddles appear, what cleaner or sealer you have used, and any product labels. Ask how a proposed treatment affects color, texture, wet grip, maintenance, and warranty. No product can promise a completely slip-proof patio, and product formulations vary. A careful recommendation should describe the conditions it suits and the upkeep it requires.

Frequently Asked Questions

What is the best way to make an existing patio less slippery?

Remove leaves, algae, moss, grease, and other residue with a cleaner approved for your paving, then rinse thoroughly. Address standing water and consider a compatible anti-slip treatment if the surface remains slick after it dries.

Does sealing a patio make it slippery?

It can, because some sealers leave a smooth film, particularly when overapplied or used on smooth paving. Choose an outdoor paving sealer and ask the manufacturer whether a compatible anti-slip additive or textured finish is suitable.

Can I use a pressure washer on patio paving?

Often, but the right setting depends on the material and its condition. Excessive pressure can erode concrete, damage softer stone, or remove jointing material, so follow the paving and washer makers’ guidance.

How do I remove algae or moss from a patio?

Use a cleaner labeled for your paving, follow its application directions, scrub as instructed, and rinse well. Reducing persistent shade and moisture can help slow regrowth.

Are anti-slip patio coatings permanent?

Usually not. Weather, cleaning, and foot traffic can reduce their effect, so follow the product’s maintenance and renewal instructions.

Will an anti-slip treatment change how my patio looks?

It may change gloss, color, or texture. Test an inconspicuous area and let it dry before treating the full surface.

When should I ask a professional for help?

Ask for advice if paving is damaged, water keeps pooling, the stone is delicate or valuable, or a treatment could affect a warranty. A professional can help identify the cause before you spend money on a product that may not solve it.

Conclusion

Start with a sweep and a careful look after rain: find the slick patch, clear the source, and see where water lingers. Then choose cleaning or a compatible treatment that suits your paving, and keep steps and walking routes clear. A patio cannot be made completely slip-proof, but regular attention can make wet-weather footing more dependable. Think of the goal as a clear path from your door to the chair in the sun—one you can use with greater confidence through the seasons.
This article is for informational purposes only and is not medical advice. Always consult a qualified healthcare professional about your specific situation.
You May Also Like

How to Choose a Zero-Gravity Recliner for the Yard

Discover practical tips to pick the perfect zero-gravity recliner for outdoor comfort. Learn about materials, features, and recent innovations for your yard.

Patio Chairs That Are Easy to Get Out Of

Discover practical patio chairs designed for easy standing. Learn how ergonomic features, materials, and latest trends make outdoor living safer and more comfortable.

A Comfortable Outdoor Setup for Morning Coffee

Discover practical tips to create a cozy, safe outdoor space for your morning coffee. Make every sunrise a relaxing, beautiful experience.

Outdoor Seating With Armrests and Support

Discover how outdoor seating with armrests and support boosts comfort, stability, and safety, especially for older adults and those with limited mobility.