
TL;DR

Turn quiet afternoons into listening time
- Thousands of audiobooks, podcasts and originals
- Listen on your phone, tablet or Echo — also offline
- Cancel anytime
Accessible Halloween decorations make seasonal displays enjoyable and navigable for people with different mobility, vision, hearing, sensory, and communication needs. Keep the route to your door clear and well lit, secure cords and props, offer a calmer option, and let visitors collect treats without needing to climb steps, ring a bell, or speak.
A glowing skeleton can make a porch feel magical—until its dangling arm catches a walker, or a hidden step disappears into the shadows. Accessible Halloween decorations keep the fun while making the approach to your door easier to see, move through, and enjoy.
You don’t need a ramp makeover or a yard full of expensive props. A few practical choices—such as a clear route, secured cords, a visible step edge, and another way to ask for treats—can make a real difference for visitors with mobility, vision, hearing, sensory, or communication needs.
This guide shows you how to make seasonal displays that welcome more people without losing the orange glow, crunchy leaves, and playful surprises that make Halloween special. Think of it like setting a table: you can make room for everyone without taking away the party.
Keep the route to your door stable and free of props, loose mats, and unsecured cords.
Use steady lighting and visible contrast to help show steps, thresholds, and route changes.
Offer a calmer path or clear warning before visitors reach flashing lights, fog, or sudden sounds.
Provide a treat option that doesn’t require stairs, a doorbell, speech, or eye contact.
Use large, plain signs and ask disabled participants what would help rather than assuming.
What makes Halloween decorations accessible without losing the spooky fun?
Accessible Halloween decorations let visitors enjoy a seasonal display while moving through it safely and understanding how to take part. That means planning for more than wheelchair access: people may have low vision, use a cane or walker, prefer less noise, communicate without speech, or simply need a little extra time at the door.
Accessibility is not a look; it’s the room your setup leaves for people. A cobweb stretched across a walkway may look eerie, but it can snag a cane or brush someone’s face. A talking prop might delight one child and unsettle another. Keep the atmosphere, but put the props where visitors won’t need to dodge, touch, or guess their way through.
For example, imagine two porches with the same friendly pumpkin display. On the first, a plastic skeleton sprawls across the path and a motion sensor blasts a scream. On the second, the skeleton sits beside a clear route, while a small sign says, “Quiet treats here.” The second porch still feels like Halloween; it also gives visitors a choice.
There is no single setup that works for everyone. If you’re decorating for a neighborhood event, ask disabled participants what would help instead of guessing. Preserve the fun while reducing barriers, and treat access as part of the design—not a last-minute fix.
Products Worth Considering

Philips Hue Festavia 130-Foot Indoor/Outdoor Smart String Lights, 500 LEDs

Philips Hue Bridge Pro Smart Lighting Hub
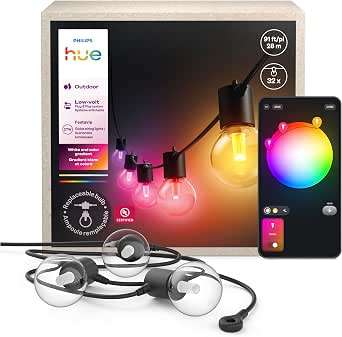
Philips Hue Festavia Globe Outdoor String Lights, 32 Bulbs, 91 ft
As an affiliate, we earn on qualifying purchases.
How can you make the route to your door easier to use?
To make an accessible Halloween route, keep a stable, unobstructed way from the sidewalk or driveway to the entrance, then check it at night from a visitor’s point of view. A clear path helps people using wheelchairs, walkers, canes, or strollers, and it gives everyone more room to pass without brushing against decorations. The route matters as a whole: a clear sidewalk does little good if a cord blocks the porch, or if the final landing is packed with props. Each transition should be usable without a visitor having to ask someone to move a decoration or steady them.
- Walk the route before decorating. Notice narrow spots, loose paving, steps, and places where a visitor might need to turn. These are potential pinch points: a person may be able to pass through but not safely stop, turn, or stay alongside a child or companion.
- Move props out of the travel path. Keep inflatable figures, buckets, and display stands to the side rather than in the middle. Grouping decorations can preserve a strong visual display while leaving a predictable corridor; scattered props may look more immersive but make it harder to anticipate where a cane, wheel, or foot can go.
- Secure cords and mats. Tape or route cables away from feet and wheels; remove curled mats and loose fabric. A small obstacle can be more than an inconvenience when someone cannot see it, lift a foot easily, or recover balance after catching a wheel or cane.
- Check the path after dark. Test porch lights and look for shadows that hide edges or changes in level. A route that seems spacious in daylight can become confusing when decorations cast moving shadows or dark surfaces blend together.
- Leave room to stop and turn. A visitor may need space to wait, maneuver, or accompany a child. A route that only works while everyone keeps moving can create pressure; a little extra space lets people pause without blocking others or feeling rushed.
There isn’t one width that fits every entrance, so use the space you have and follow local accessibility guidance for public events or construction. At home, a practical test is to walk through with a bag or laundry basket held at your sides: if you keep bumping props, the route needs more breathing room. This is a useful screening check, not a substitute for formal accessibility requirements where those apply.
Picture a small porch with one step and a narrow garden path. Instead of lining both edges with pumpkins, place them in a cluster beside the door, secure a cord along the wall, and keep the step landing clear. That simple edit can make the entrance easier to approach without stripping away its autumn color. The tradeoff is a little less decoration along the path, but the display becomes easier to enjoy rather than an obstacle visitors must negotiate.
How do you make steps and decorations easier to see after dark?
Make steps, thresholds, and route changes stand out from what surrounds them, using steady light and strong contrast rather than color alone. At night, a dark step beside a dark mat can look like one flat surface, even when a visitor is watching carefully. When edges are hard to distinguish, people may misjudge where to place a foot or wheel; clear visual information gives them time to adjust before reaching the change in level.
Try a warm porch bulb and a battery lantern placed beside—not on—the walking route. A strip of light-colored tape at the edge of a step may make the change in height easier to spot, while a bright sign on a dark door can point visitors toward the right entrance. Use stable, weather-suitable lights and keep every cord out of the way. The goal is enough even light to read the route, not a dramatic spotlight that creates glare or deep shadows elsewhere.
Think of contrast as the outline around a drawing: without it, the important shapes blur together. Orange lights against a black wall can look dramatic, but don’t assume a colorful glow will show a step clearly. A visitor with low vision may benefit more from a steady, bright light and a distinct edge than from a flickering pumpkin projector. The projector can stay as decoration, but it shouldn’t be responsible for showing where someone needs to step.
For instance, if your porch has three gray steps, test them from the sidewalk at dusk. If the top and bottom edges disappear, add lighting that reaches the treads and make the edges visually distinct. Avoid relying on a glowing decoration as your only light source; a moving shadow can make the route harder to read just when someone needs a clear view. Check from more than one position, too: a light that works for someone standing at the gate may leave the steps dim for someone approaching from the side.
Which Halloween effects can feel welcoming—and which can overwhelm?
The most welcoming Halloween effects give visitors a clear choice: use steady lights and gentle sounds as the default, and keep flashes, sudden noises, fog, and jump scares away from the main route. These effects can be uncomfortable or disorienting for some people, including those with sensory sensitivities, PTSD, migraines, or seizure disorders; responses vary, so don’t assume one experience fits everyone. The practical point is not to decide who can handle which effect, but to make sure no one has to encounter a startling effect just to reach the door.
A quiet display can still feel delightfully spooky. A row of lanterns, a soft rustle of paper bats, or a grinning pumpkin with a steady glow creates atmosphere without a sharp “BANG!” behind someone’s shoulder. If you use a motion-activated sound or prop, place it away from the entrance and label it plainly so visitors can decide whether to approach. Be aware that a warning alone may not be enough if the effect is unavoidable; placement and an alternative route make the choice real.
For a family-friendly block, you could mark one approach “Quiet treats” and place a second, more theatrical display farther from the path. Keep the calm route easy to find; don’t make visitors pass a fog machine or a sudden scream to reach it. A sign with simple wording—“No flashing lights on this path”—can answer a question before someone has to ask aloud. This arrangement lets people who want the theatrical effects enjoy them while reducing pressure on visitors who would rather avoid them.
Flashing lights are not comfortable for everyone, and some people have medical reasons to avoid them. If you’re planning a community event, make effects optional and share information in advance. That advance notice helps visitors decide whether to attend and which route to use, while keeping the host from having to make assumptions at the door. Choice is more useful than guessing: visitors can enjoy the level of spooky that suits them, while you keep the neighborhood’s Halloween spirit intact.
How can you offer treats without requiring stairs, a doorbell, or speech?
Offer at least one simple way to get treats that doesn’t depend on climbing steps, reaching a high table, hearing a chime, making eye contact, or saying “trick or treat.” Flexible choices help visitors with different bodies and communication styles take part with less pressure. They also make the interaction easier for a host: a clear signal or self-serve basket can prevent visitors from being left waiting when a bell goes unheard or the host is briefly away from the door.
Set a treat basket at a reachable height on a stable table, or bring it to the edge of the accessible route when a visitor signals. Add a sign such as, “Knock, wave, or point for treats,” and give people time to respond. If someone doesn’t speak, let a gesture, communication device, or companion’s explanation count; no one needs to perform a greeting to deserve a treat. A pause can simply mean someone is deciding how to communicate, so rushing to fill the silence may unintentionally take away their chance to choose.
Consider the difference between a table crowded with fragile decorations and one with a clear space for a hand, cane, or mobility device. Keep small objects away from the edge, and don’t place sharp or wobbly props where someone may brush against them. If a visitor uses a service animal, secure household pets elsewhere and leave enough room for the animal and handler to move together. A neat, stable handoff area may be less elaborate than a decorated display table, but it makes the treat itself easier to reach without risking spills or breakage.
For example, an older host who can’t stand at the door all evening might place a labeled basket beside the level entry and use a battery doorbell connected to a visible light—or invite visitors to wave. If the route includes stairs that can’t be avoided, clearly state the alternative, such as a treat handoff at the sidewalk. Make participation easy to request and easy to accept. The key is to make the alternative obvious in advance, rather than leaving visitors to negotiate a workaround after they arrive.
What should your signs say so visitors know what to expect?
Good Halloween signs use large, high-contrast lettering and short, plain instructions that explain where to go and what to do. A visitor shouldn’t have to decode a joke, hunt for tiny print, or guess whether a prop will suddenly move. Clear signs reduce the amount of information someone has to work out while also navigating a dark or busy entrance.
Try messages such as “Quiet route to treats,” “Please wave if you’d like a treat,” or “Treat basket at the end of the path.” Pair words with a familiar symbol when it helps, and place the sign where someone can see it before choosing a route. Avoid relying on color alone; a red arrow on a dark background may not stand out for every reader. If a sign explains a choice, make sure the route or option it describes is genuinely available; otherwise, the message can create more uncertainty than it resolves.
One neighbor might tape a handwritten note beside the doorbell: “You can knock, wave, or point—no need to ring.” Another could mark a calmer path with a clear arrow and keep the spooky sound effects in the yard. These small instructions prevent awkward moments for visitors who can’t hear a chime, can’t reach the bell, or don’t use speech. They also help hosts respond consistently, instead of expecting visitors to explain their needs in a crowded doorway.
Keep signs readable in the dark and protected from rain. A sheet of white paper inside a clear sleeve, printed in thick black letters, often works better than a tiny decorative plaque. For a shared event, post the same information online or at the entrance, too. Predictable instructions reduce guesswork and let visitors decide what feels comfortable before they reach the door. Putting key details in more than one place also helps people who arrive from different directions or don’t notice a sign until they are close.
How can you keep a haunted display fun and easier to navigate?
You can make a haunted display more accessible by separating the main route from interactive props, offering a calmer way through, and making any startling effects clear before visitors reach them. A spooky setting doesn’t need to be a maze of hidden cords, low-hanging fabric, or surprises at every turn. The more predictable the route is, the more attention visitors can give to the atmosphere instead of watching every step for a new obstacle.
Start by walking the route in ordinary light, then again after dark. Check whether a cane tip or wheelchair wheel could catch on a prop, whether anyone must squeeze past an actor, and whether the exit is easy to see. Keep smoke or fog out of areas where it hides floor edges, and make sure visitors can leave without needing to ask an actor for help. A single clear exit matters because someone who feels uncomfortable should be able to change their mind without having to push through the rest of the experience.
For a community haunt, a sign at the entrance might say, “This route includes loud sounds and moving props; a quiet route is available beside the garden.” Put the calm option in plain view and avoid treating it as an afterthought. If the property has steps and no accessible entrance, explain the limitation and offer a treat station at a level, reachable location instead. Be honest about what each route includes: a warning is useful only if visitors can understand the likely experience and choose a practical alternative.
Before opening, ask a disabled guest or local access advisor to review the route if they’re willing. Their feedback can catch things hosts miss, such as a prop that blocks a turning space or a sign that can’t be read from a seated position. Accessibility guidance depends on the site and event; consult a qualified access professional for complex public setups. A little rehearsal beats a last-minute scramble. A test run gives you time to fix problems without asking visitors to manage them on Halloween night, while feedback helps distinguish a display that merely looks accessible from one people can actually use.
Frequently Asked Questions
What makes Halloween decorations accessible?
Accessible decorations let people with different mobility, vision, hearing, sensory, and communication needs enjoy the display and reach the entrance. Clear paths, visible edges, secured props, easy-to-read signs, and flexible ways to collect treats all help.
How can I decorate a porch without blocking a wheelchair or walker?
Keep pumpkins, inflatables, cords, and other props beside the walking route rather than in it. Leave room to approach and turn, secure anything that could catch a wheel or cane, and test the route after dark.
What Halloween effects may be overwhelming for some visitors?
Flashing lights, sudden loud sounds, fog, and jump scares can be uncomfortable or disorienting for some people. Responses vary, so offer a calmer route and give a clear warning before visitors reach effects that may startle them.
How can children get treats if they can’t climb stairs or ring a bell?
Offer a level treat station when possible, or bring the basket to the edge of an accessible route. A sign can invite visitors to knock, wave, point, or use another signal instead of requiring a doorbell or spoken request.
What should I write on an accessible Halloween sign?
Use large, high-contrast text with plain instructions, such as “Quiet route to treats,” “Please wave for a treat,” or “Treat basket beside the door.” Place the sign where visitors can read it before choosing a route, and don’t rely on color alone to explain directions.
Conclusion
You don’t have to choose between Halloween atmosphere and a welcoming entrance. Keep the route clear, make steps visible, offer a quieter option, and give visitors more than one way to ask for a treat.
Before the first knock, step outside after dark and walk your setup as if you were seeing it for the first time. If the path feels clear and the welcome feels easy to understand, your decorations are doing more than looking spooky—they’re making room for the whole neighborhood.