TL;DR

Turn quiet afternoons into listening time
- Thousands of audiobooks, podcasts and originals
- Listen on your phone, tablet or Echo — also offline
- Cancel anytime
This checklist guides you through essential steps to boost your home’s comfort, safety, and efficiency. Start with safety and air sealing, then move to insulation, systems, and controls for best results.
Imagine walking into a home where every room feels just right—neither too hot nor too cold, no drafts whispering through gaps, and the air smells fresh. Achieving this isn’t about a single upgrade; it’s about a carefully planned series of steps that work together. Whole-home comfort depends on how well your building envelope, systems, and controls collaborate. You’ll learn a clear, practical checklist that helps you prioritize upgrades so you can enjoy a safer, more comfortable home—without wasting money or effort.
This guide isn’t about quick fixes or expensive remodels. It’s about thoughtful, strategic improvements that make a noticeable difference—step by step. Whether you’re an older adult living at home or a caregiver helping a loved one, these tips help you focus on what truly matters: safety, comfort, and efficiency.
Start with a thorough home assessment to identify comfort and safety issues before making upgrades.
Control air leaks first—air sealing can dramatically boost comfort and energy savings.
Insulation is most effective when paired with air sealing; focus on continuous, properly installed layers.
Upgrade windows and doors only after sealing and insulation improvements for maximum impact.
Prioritize safety, moisture, and air quality before upgrading HVAC equipment to avoid wasting effort.
Home Performance Guide · Sequenced Checklist
A Whole-Home Comfort Upgrade Checklist
Safety first, seal second, insulate third. This checklist walks you through the correct order of home upgrades—assessment, air sealing, insulation, windows & doors, systems, and controls—so every dollar works harder and every room feels just right.
Phase 01 · Diagnose
Start with a home assessment to find comfort killers
Walk through your home and log rooms that feel too hot, cold, humid, dry, drafty, noisy, or stuffy. Note when problems occur—by season, time of day, or weather. Check energy bills for spikes, inspect hidden areas, and test safety devices.
Self-Inspection
Room-by-Room Log
Track discomfort by season and time of day. Review energy bills for unusual consumption. Inspect attic, basement, crawl space, windows, and exterior for gaps and insulation voids.
Professional Audit
Blower-Door Test
Measures overall air leakage of the building envelope. Combined with infrared imaging, it maps missing insulation and thermal weak points—giving you a clear fix-first list.
Safety Check
CO, Smoke & Radon
Test carbon monoxide alarms, smoke alarms, and radon levels—especially with combustion appliances. Health risks are prioritized before any comfort upgrade.
Phase 02 · Seal
Control air leaks—stop drafts before adding insulation
Air leaks allow uncontrolled exchange of indoor and outdoor air, forcing HVAC systems to work harder. Sealing is low-cost with high returns—but must be paired with ventilation planning.
⚠ Ventilation Caution
Never seal combustion-air openings or make a home substantially tighter without evaluating ventilation needs and fuel-burning appliances. Over-sealing without ventilation causes stale air and moisture problems.
Phase 03 · Insulate
Add insulation where it counts
Insulation is your home’s thermal armor—but only works as a continuous, properly installed layer paired with air sealing. Adding insulation over unsealed gaps traps drafts, moisture, and pests.
Key Insight
R-49 attic insulation significantly lowers heating bills in northern climates—but only when the attic is properly sealed and ventilated. Moisture-laden insulation loses R-value and promotes mold.
Phase 04 · Openings
Windows & doors: repair first, replace only if needed
Air sealing often beats window replacement for comfort. Try low-cost fixes before investing in new units with long payback periods.
| Measure | Comfort Gain | Cost | Payback | Recommended |
|---|---|---|---|---|
| Weatherstripping & door sweeps | High | Low | Fast | ✓ First |
| Sealing gaps around frames | High | Low | Fast | ✓ First |
| Storm windows | Medium | Medium | Moderate | ~ Case-by-case |
| Exterior shading / solar film | Medium | Medium | Moderate | ~ South-facing |
| Full window replacement | Medium–High | High | Slow | ✗ Last resort |
Phase 05–06 · Systems & Controls
Upgrade HVAC and ductwork—after the envelope
Right-sizing equipment, sealing ducts, and balancing airflow come only after safety, sealing, and insulation are complete. Oversized equipment cycles too fast, swings temperatures, and wears prematurely.
HVAC Checklist
Equipment & Airflow
- Size equipment from room-by-room load calculations—not existing unit size
- Replace filters per manufacturer schedule; service heat pumps, furnaces, boilers
- Inspect refrigerant lines, condensate drains, burners, heat exchangers
- Keep registers clear; verify thermostat placement and configuration
Ductwork Checklist
Seal & Balance
- Seal accessible joints with approved mastic or HVAC tape
- Insulate ducts in attics, garages, and crawl spaces
- Check for crushed, disconnected, or poorly routed ducts
- Measure airflow and static pressure; ensure return-air paths
Rule of Thumb
Closing multiple registers to redirect air can increase duct pressure and harm the system. Have ducts professionally balanced when rooms remain uncomfortable.
Start with a home assessment to find comfort killers
The first step is understanding what’s wrong. Walk through your home and note rooms that feel too hot, cold, humid, dry, drafty, noisy, or stuffy. Keep a simple log—when do these issues happen? During certain seasons or times of day? Check your energy bills for spikes that hint at hidden problems. Look inside your attic, basement, or crawl space—these hidden areas often hide leaks or insulation gaps.
If you want to go deeper, consider a professional energy audit. Blower-door tests measure air leakage, while infrared imaging reveals missing insulation or thermal leaks. These tools give you a clear map of what needs fixing first. For example, a home with drafts around windows and unsealed attic hatches is ripe for air sealing. Don’t forget to test carbon monoxide, smoke alarms, and radon levels, especially if you use combustion appliances.
Understanding these issues is critical because they directly impact comfort, safety, and energy costs. Unaddressed leaks or poor insulation can cause drafts, uneven temperatures, and higher utility bills. Moreover, certain issues like radon or carbon monoxide pose health risks that should be prioritized. A thorough assessment helps you identify which problems are urgent versus those that can be addressed gradually, ensuring your efforts are both effective and safe.
air sealing spray foam for basement rim joists
As an affiliate, we earn on qualifying purchases.
As an affiliate, we earn on qualifying purchases.
Control air leaks—stop drafts before adding insulation
Air leaks are often the most immediate comfort killers because they allow uncontrolled exchange between indoor and outdoor air. This not only makes your home drafty but also forces your HVAC system to work harder to maintain temperature, increasing energy costs. Sealing these leaks improves comfort by eliminating cold drafts in winter and hot spots in summer, and it enhances energy efficiency. The tradeoff, however, is that over-sealing without proper ventilation can lead to stale indoor air and indoor air quality issues. That’s why sealing should be paired with good ventilation strategies later in the process.
Common leak points—like attic hatches, plumbing penetrations, recessed lights, rim joists, foundation cracks, fireplace surrounds, exterior doors, window frames, and duct joints—are often overlooked but contribute significantly to energy waste and discomfort. For example, sealing the rim joist in your basement with spray foam can cut air leakage by up to 60%, which has a dramatic impact on maintaining consistent indoor temperatures. The cost-effectiveness of air sealing is high because it often requires minimal investment but yields substantial comfort and savings.
Tradeoffs include the need to balance airtightness with proper ventilation. Completely sealing the home without addressing ventilation can cause indoor air quality to deteriorate, leading to health issues or moisture problems. Therefore, sealing is a critical first step, but it must be done thoughtfully, with an understanding of the home’s ventilation needs and potential impacts on indoor air quality.
high R-value attic insulation batts
As an affiliate, we earn on qualifying purchases.
As an affiliate, we earn on qualifying purchases.
Add insulation where it counts—stop heat loss and gain
Insulation acts as your home’s thermal armor, reducing the rate of heat transfer through walls, attics, floors, and other building components. Proper insulation maintains consistent indoor temperatures, reduces strain on your HVAC system, and lowers energy costs. But its effectiveness depends on correct installation and pairing with air sealing. Without sealing gaps first, insulation can trap drafts, moisture, or even pests, which can cause discomfort or damage over time. The tradeoff is that adding insulation without addressing air leaks can lead to moisture buildup, mold, or reduced effectiveness, ultimately wasting money and effort.
Focus on continuous, well-installed insulation layers—especially in attics, exterior walls, and rim joists. For example, adding R-49 attic insulation in northern climates can significantly lower heating bills, but only if the attic is properly sealed and ventilated. Insulation works best when it creates a continuous barrier, preventing heat from bypassing it through gaps or cracks. Proper installation also involves ensuring insulation stays dry—moisture-laden insulation loses R-value and can promote mold growth, which affects health and durability.
Tradeoffs include the possibility of moisture entrapment and the need for proper ventilation. Overspending on insulation that isn’t correctly installed or paired with air sealing can lead to little or no benefit, or even harm. Therefore, insulation should be viewed as part of a comprehensive approach, with attention to detail in installation and moisture management to ensure long-term performance.
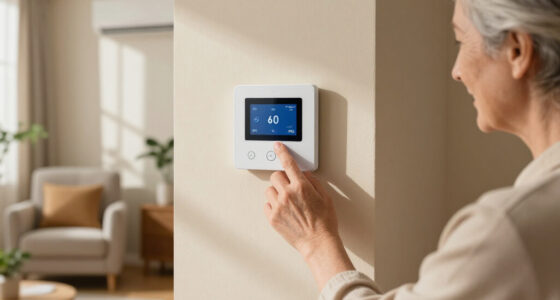
energy-efficient programmable thermostat
As an affiliate, we earn on qualifying purchases.
As an affiliate, we earn on qualifying purchases.
Evaluate and upgrade windows and doors—balance cost and comfort
Windows and doors are both aesthetic features and critical components of your home’s thermal envelope. They influence comfort, energy efficiency, and curb appeal. Before replacing them, simple fixes—like repairing damaged seals, adding weatherstripping, installing door sweeps, and sealing gaps—can significantly reduce drafts and heat loss. These cost-effective measures often provide quick comfort improvements and can delay or eliminate the need for costly replacements. For example, sealing drafts around older windows can reduce heat loss by up to 25%, which translates to noticeable savings.
However, if windows are old, foggy, or still draft despite sealing efforts, replacement may be justified. Modern windows with low U-values and high-performance glazing can dramatically improve insulation, reduce noise, and enhance aesthetics. But they come with higher costs and longer payback periods. The decision involves weighing upfront investment against ongoing savings and comfort gains.
Consider exterior shading—awnings, shutters, or solar-control films—to mitigate overheating, especially on south-facing windows. Sunlight can be a double-edged sword: providing warmth and daylight but also causing glare and heat gain that can make rooms uncomfortable or increase cooling loads. Proper shading strategies can optimize natural light while controlling heat gain, balancing comfort and energy efficiency.
As an affiliate, we earn on qualifying purchases.
Conclusion
Think of your home as a living organism—each part influences the whole. By following this carefully ordered checklist, you create a resilient, comfortable space that respects safety and enhances daily life. Remember: small, strategic steps often lead to the biggest comfort gains, making your home a sanctuary you can truly enjoy.
Start with the basics: sealing leaks, improving insulation, and addressing safety. From there, every upgrade builds toward a home that feels just right—warm, cool, fresh, and safe—no matter the season.
Fall Picks
fall essentials
As an affiliate, we earn on qualifying purchases.