TL;DR
Open a free Amazon Business account
Business pricing, bulk buying and tax-exempt orders.
Create a free accountAs an affiliate, we earn on qualifying purchases.
Adding a ramp without major construction is possible using threshold, portable, and modular systems. Measure your rise carefully, choose the right type, and ensure stability and safety for a cost-effective, temporary or permanent solution.
Imagine a step that feels like a mountain — especially when you’re trying to get in or out of your home safely. Now picture a simple, sturdy ramp that can be added in an hour, not days, without wrecking your entryway.
This guide shows you how to add a ramp that respects your space, your budget, and your need for safety. No need for major construction or permanent changes. Instead, you’ll learn practical options that can be installed, adjusted, or removed as needed, making your home more accessible today, tomorrow, and years down the line.
Always measure the total rise carefully to determine the correct ramp length and slope.
Choose the ramp type based on your space, budget, and permanence — from threshold to modular systems.
Support your ramp on a firm, level surface to prevent wobbling or instability.
Include level landings and consider door swing, handle height, and edge protection for full accessibility.
Check local rules beforehand to avoid permit issues or code violations.
How to Add a Ramp Without Major Construction
A step that feels like a mountain can become a safe, sturdy ramp in an hour — not days. Threshold, portable, and modular systems let you install, adjust, or remove an accessible entry without pouring concrete, altering your foundation, or rebuilding your entrance.
Start by measuring the rise — then plan your ramp length
Measure vertically from the lower walking surface to the top of the threshold. This single number determines everything: your ramp’s length, layout, and slope. Use a tape measure, and remember to include space for level landings at both the top and bottom.
For every 1 inch of rise, allow at least 12 inches of ramp length. Gentler slopes are easier and safer. Portable ramps are sometimes used at steeper angles — but only when the manufacturer permits it and the user can operate safely.
Pick the right ramp type for your space, budget, and permanence
Five proven no-construction options cover nearly every situation — from a half-inch sliding-door track to a full porch entry. Each can be installed, adjusted, or removed as needed.
Threshold Ramps
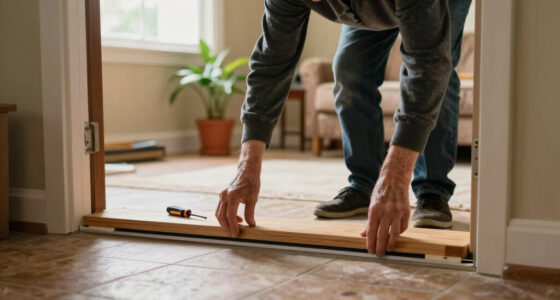
Best for small lips, sliding-door tracks, and short level changes.
Suitcase Ramps
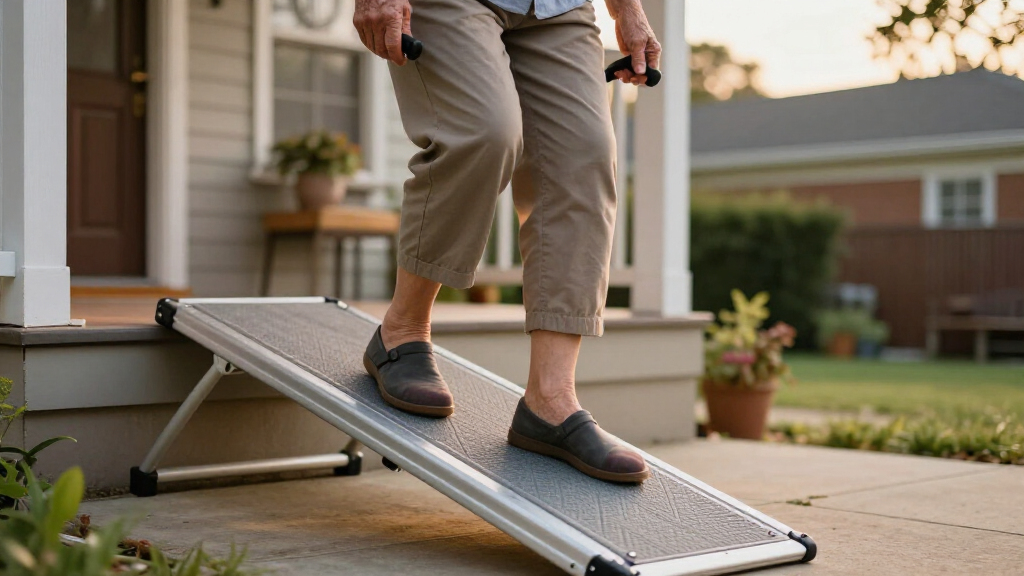
Best for temporary use and travel with wheelchairs or scooters.
Telescoping & Roll-Up Ramps
Best for variable heights and compact storage between uses.
Modular Aluminum Ramps
Best for larger rises and long-term use — the top low-construction solution.
Temporary Wooden Ramps
Best for economical DIY projects when budgets are tight.
Portable Platform Lifts
An alternative where a sufficiently long ramp simply won’t fit the footprint.
From measurement to safe use — the full workflow
A modest rise can produce a long ramp. A switchback or L-shaped layout can shrink the straight-line footprint — but never the total ramp length. Follow this sequence and check local rules before you build.
📏 Measure the Rise
Vertical distance from ground to threshold top. Landings at top and bottom included.
📐 Calculate Length
Apply the 1:12 rule; plan landings at direction changes and between long runs.
🧩 Choose System
Match ramp type to rise, space, budget, and how permanent the solution should be.
🪨 Set Foundation
Firm, level, load-bearing surface with adjustable supports on suitable pads.
🛡️ Safety Checks
Edge protection, traction, drainage, handrails, weight capacity — then verify stability.
Ensure your ramp rests on a firm, level foundation
Even the best ramp is unsafe without proper support. Modular aluminum systems come with adjustable legs and footings that sit on pavers or concrete pads — no digging, no excavation. A wobbling ramp is a hazard, especially for someone with mobility challenges.
Do
- Rest supports on a firm, level, load-bearing surface
- Use adjustable supports and footings on pavers or pads
- Secure supports exactly as the manufacturer directs
- Check for stability — no sliding, rocking, or tipping — before every use
Don’t
- Place the ramp on loose gravel, soft soil, or shifting grass
- Let the ramp separate from the landing or tip when weight shifts near an edge
- Excavate or pour concrete when adjustable pads will do the job
- Assume “portable” means “unstable is acceptable” — it doesn’t
| Surface Type | Stability | Best Paired With | Recommended? |
|---|---|---|---|
| Concrete pad / pavers | ✓ Excellent | Modular aluminum legs with footings | ✓ Yes |
| Firm, level compacted ground | ~ Good | Adjustable supports + load-spreading pads | ✓ Yes |
| Wooden deck surface | ~ Fair | Threshold or modular ramps, checked for rot | ~ With inspection |
| Loose gravel | ✗ Poor | — | ✗ Avoid |
| Soft soil / shifting grass | ✗ Hazard | — | ✗ Never |
Doorways, handrails, and load capacity — the numbers that matter
A ramp alone doesn’t guarantee access. The doorway, handrail placement, and weight limits determine whether the whole entry works safely for the person using it.
Overloading a ramp can lead to structural failure or collapse. Total load includes the user, wheelchair or scooter, caregiver, and any carried items — powered wheelchair users should double-check that capacity exceeds combined weight plus a safety margin. When in doubt on handrails, always opt for more support rather than less: the added safety margin can be life-changing.
The final checklist before you call it accessible
A poorly designed doorway can negate the benefits of a well-built ramp. Run through these details to ensure full accessibility — and check local rules beforehand to avoid permit issues or code violations.
Door Swing Direction
Inward-swinging doors can push into the ramp and block access. Outward-opening or sliding doors work better — watch for storm-door interference too.
Handle & Lock Operation
Easy-to-grasp lever handles beat knobs. Simply replacing a knob with a lever can make a big difference for limited grip strength.
Level Landings & Turning Space
The landing outside the door must be level and large enough for turning and maneuvering — a longer landing may be needed depending on door swing.
Edge Protection & Traction
Raised curbs keep wheels and walkers from slipping off the sides. Open-pattern aluminum decking drains water but must not trap small wheels or cane tips.
Weather & Drainage
Keep water, snow, leaves, algae, and ice from accumulating — pooling water can freeze into dangerous ice patches. Apply slip-resistant coating or tape.
Local Codes & Permits
Handrail requirements depend on rise, length, location, and governing code. Verify local rules beforehand to avoid violations — and clear sidewalks, drainage paths, and utility access.
Start by measuring the rise — then plan your ramp length
The first step is to measure how high the threshold or step is—the vertical distance from the ground to the top of the doorway. This number determines the length of your ramp.
For safety and comfort, aim for a slope no steeper than 1:12. That means for every inch of rise, you need at least 12 inches of ramp. So, a 6-inch step requires a 6-foot-long ramp. If space is tight, you might need to compromise slightly, but avoid steeper angles that can make mobility difficult and unsafe.
For example, if your porch has a 4-inch step, a 4-foot ramp with a gentle slope will do. Measure carefully—use a tape measure, and remember to include space for a landing at the bottom and top.
As an affiliate, we earn on qualifying purchases.
Pick the right ramp type — what fits your space and needs
Choosing the right ramp depends on your space, budget, and how often you’ll need it. Here’s a quick comparison:
| Ramp Type | Best For | Pros | Cons |
|---|---|---|---|
| Threshold ramps | Small lips and door thresholds | Easy to install, inexpensive, quick | Limited height, may need multiple ramps |
| Portable suitcase ramps | Temporary use, travel | Foldable, lightweight, versatile | Less stable on uneven surfaces |
| Telescoping ramps | Variable heights, storage | Adjustable, easy to store | Setup can be tricky, less sturdy |
| Modular aluminum ramps | Larger rises, long-term use | Reconfigurable, durable, reusable | More initial setup, cost |
| Temporary wooden ramps | Economical, DIY projects | Cheap, customizable | Needs weatherproofing, maintenance |
For instance, if you need a quick fix for a small step, a threshold ramp might be best. For more permanent solutions, modular aluminum ramps give you flexibility and strength without heavy construction.
As an affiliate, we earn on qualifying purchases.
Ensure your ramp rests on a firm, level foundation
Even the best ramp can be unsafe if it’s not supported properly. The surface beneath should be stable, firm, and capable of bearing weight. If your yard is uneven, adjustable supports can level the ramp without digging or pouring concrete.
For example, a modular aluminum ramp often comes with adjustable legs and footings that sit on pavers or concrete pads. Avoid placing a ramp on loose gravel, soft soil, or shifting grass — these can cause wobbling or tipping.
Secure the supports as directed by the manufacturer, and check for stability before use. A wobbling ramp is a hazard, especially for someone with mobility challenges.
Why this matters: A stable foundation is critical because it directly affects the safety and reliability of the ramp. An uneven or unstable base can cause the ramp to shift or collapse under weight, leading to falls or injuries. Investing time in proper support ensures the safety of users and prolongs the lifespan of your ramp.
As an affiliate, we earn on qualifying purchases.
Make the doorway accessible — don’t forget the details
A ramp alone doesn’t guarantee easy access. Check the doorway’s width—aim for at least 32 inches clear opening. Ensure the landing space outside the door is level and large enough for turning or maneuvering.
Consider how the door swings. An inward door that pushes into the ramp can block access. Outward-opening doors or sliding doors often work better. Also, evaluate handle height and lock operation—easy-to-grasp levers are best.
For example, if your door swings inward, a longer landing or a different door type might be necessary to prevent it from hitting the ramp or user. Sometimes, simply replacing a knob with a lever handle makes a big difference. Ensuring the doorway is accessible is crucial because it directly impacts whether a person can safely and comfortably enter or exit your home. A poorly designed doorway can negate the benefits of a well-built ramp, so paying attention to these details ensures full accessibility and reduces frustration or hazards during use.
As an affiliate, we earn on qualifying purchases.
Add edge protection, traction, and drainage to outdoor ramps
Outdoor ramps face weather challenges — rain, snow, leaves, ice. Slip-resistant surfaces are a must. Raised edges or curbs can keep wheels or walkers from slipping off the sides.
For example, aluminum decking with open patterns allows water to drain away but must be designed not to trap small wheels or cane tips. Applying textured, slip-resistant coating or tape can improve grip.
Why this matters: Proper surface treatment and drainage are essential for maintaining safety and preventing accidents. Wet or icy surfaces dramatically increase fall risk, especially for users with limited mobility or balance issues. Raised edges serve as a visual and physical cue, helping users stay centered on the ramp, while effective drainage prevents water pooling that can freeze, creating dangerous ice patches. Regular maintenance, such as clearing debris and applying slip-resistant coatings, ensures the ramp remains safe and functional across seasons. In essence, these enhancements extend the usability and safety of outdoor ramps, making them dependable year-round.
Decide if you need handrails — and how to install them right
Handrails boost safety, especially on longer or steeper ramps. They should be graspable, sturdy, and positioned so they don’t interfere with mobility aids or door clearance.
For example, a 4-foot ramp with a slope approaching 1:12 often benefits from a handrail on one or both sides. Attach them securely to the ramp frame, at a height of about 34-38 inches from the surface.
Why this matters: Properly installed handrails provide critical support, helping prevent falls and offering reassurance for users with balance or strength issues. Incorrect placement or insecure attachment can render handrails ineffective or even hazardous. When installing, consider the user’s specific needs—height, grip strength, and ease of access. When in doubt, always opt for more support rather than less, as the added safety margin can be life-changing for users. Handrails that are too high or too low may be ineffective or uncomfortable, so precise placement is key to maximizing their benefit.
Verify the weight capacity of your ramp — don’t overlook safety limits
Every ramp has a maximum load capacity, which includes the user, wheelchair or scooter, caregiver, and any carried items. Check the manufacturer’s specs carefully.
For example, a typical modular aluminum ramp might support 600 to 1,000 pounds. If you or a loved one use a powered wheelchair, double-check that the ramp’s capacity exceeds combined weight plus safety margin.
Why this matters: Overloading a ramp can lead to structural failure, collapse, or damage, posing serious safety risks. Being aware of weight limits ensures you don’t unintentionally compromise safety. Periodic inspections for stress, cracks, or deformation are equally important—over time, wear and tear can reduce capacity. Maintaining proper load limits and checking the ramp regularly helps ensure it remains a safe, reliable passage for all users, preventing accidents before they happen.
Understand the rules — what permits and codes might apply
Rules vary depending on where you live. Some local building codes, zoning laws, or homeowner associations require permits or inspections even for removable ramps. Always check with your city or county before installation.
For example, in many areas, a modular ramp over a certain length or height may need a permit or must meet specific safety standards. Some communities also have rules about setbacks, support anchors, or guardrails.
Why this matters: Complying with local regulations ensures your ramp is legal and safe, preventing potential fines or the need to remove or modify your installation later. Understanding these rules beforehand can save you time and money, and help you avoid safety issues or liability concerns. Contact your local building department or housing authority early in the planning process to clarify requirements, ensuring your project aligns with all applicable standards.
Follow a simple step-by-step plan for no-major-construction ramp installation
Getting a ramp in place without heavy work involves a clear sequence:
- Measure the rise, doorway, and available space.
- Select the device that suits your needs — threshold, portable, or modular.
- Calculate the needed ramp length using the 1:12 slope rule.
- Plan for landings, turns, and transitions.
- Choose a tested, supported system that fits your space and capacity.
- Prepare a firm, level base — pads, pavers, or supports.
- Assemble and secure the ramp according to instructions.
- Add handrails, edge barriers, and slip-resistant surfaces.
- Test stability, clearance, and door swing.
- Follow through with inspections and routine maintenance.
This straightforward approach keeps the project simple, safe, and adaptable to your home’s needs.
Latest trends making no-major-construction ramps smarter and easier
Modular aluminum systems are evolving, with adjustable legs, quick-assembly sections, and easy reconfiguration. Rentable ramps are now common, ideal for temporary needs or recovery periods. Better threshold transitions—like beveled rubber or aluminum—reduce abrupt steps, making entry smoother.
Designs now focus on complete access — from parking to interior — with durable, slip-resistant surfaces. Portable lifts are gaining traction where space is tight or terrain is uneven. These innovations mean safer, more flexible options for aging in place or accommodating mobility needs without heavy work.
Avoid common pitfalls — what to watch out for
Don’t pick a ramp that’s too short or steep — it’s a hazard. Never place a ramp on soft soil or uneven ground without support. Always include a level landing outside the door; it’s crucial for safe transition.
Secure the upper transition properly, watch for slippery surfaces, and clear debris regularly. Don’t assume portable equals code-free — verify local requirements. Measure your actual rise before buying, and don’t ignore the weight your ramp must support.
Ignoring these details can turn a good idea into a safety risk or legal headache. Taking the time to plan thoroughly and adhere to safety standards prevents accidents and legal complications, ensuring your ramp remains a reliable, safe solution for years to come.
Frequently Asked Questions
How long should a wheelchair ramp be?
A ramp should follow the 1:12 slope rule—meaning 12 inches of length for every inch of rise. For example, a 6-inch step needs at least a 6-foot-long ramp for safe, gentle access.
Can I place a portable ramp over steps?
Yes, but only if the ramp is designed for that purpose. It must be supported securely at both ends, have an acceptable slope, and not slip or shift when in use. Check manufacturer instructions and local codes.
Do I need a permit for a removable ramp?
It depends on your local rules. Some areas require permits for ramps over a certain length or height, even if they’re temporary. Always check with your city or county before installation.
Does a home ramp need to meet ADA standards?
Usually not, since the ADA mainly governs public spaces. However, local building codes or rental agreements may have specific requirements. Verify with local officials to stay compliant.
What’s the best material for outdoor ramps?
Aluminum is lightweight, corrosion-resistant, and easy to reconfigure, making it ideal for outdoor use. Rubber or composite surfaces also offer slip resistance and durability.
Conclusion
Adding a ramp without heavy construction is about smart choices and careful planning. With the right approach, you create a safer, more welcoming home — one step at a time.
Think of it as giving your home a gentle, supportive bridge that’s easy to install, remove, or modify. Focus on stability, safety, and simplicity, and you’ll make a lasting difference in quality of life.
Flea & tick season Picks
flea and tick prevention
As an affiliate, we earn on qualifying purchases.